Easy Peppermint Bark Recipe
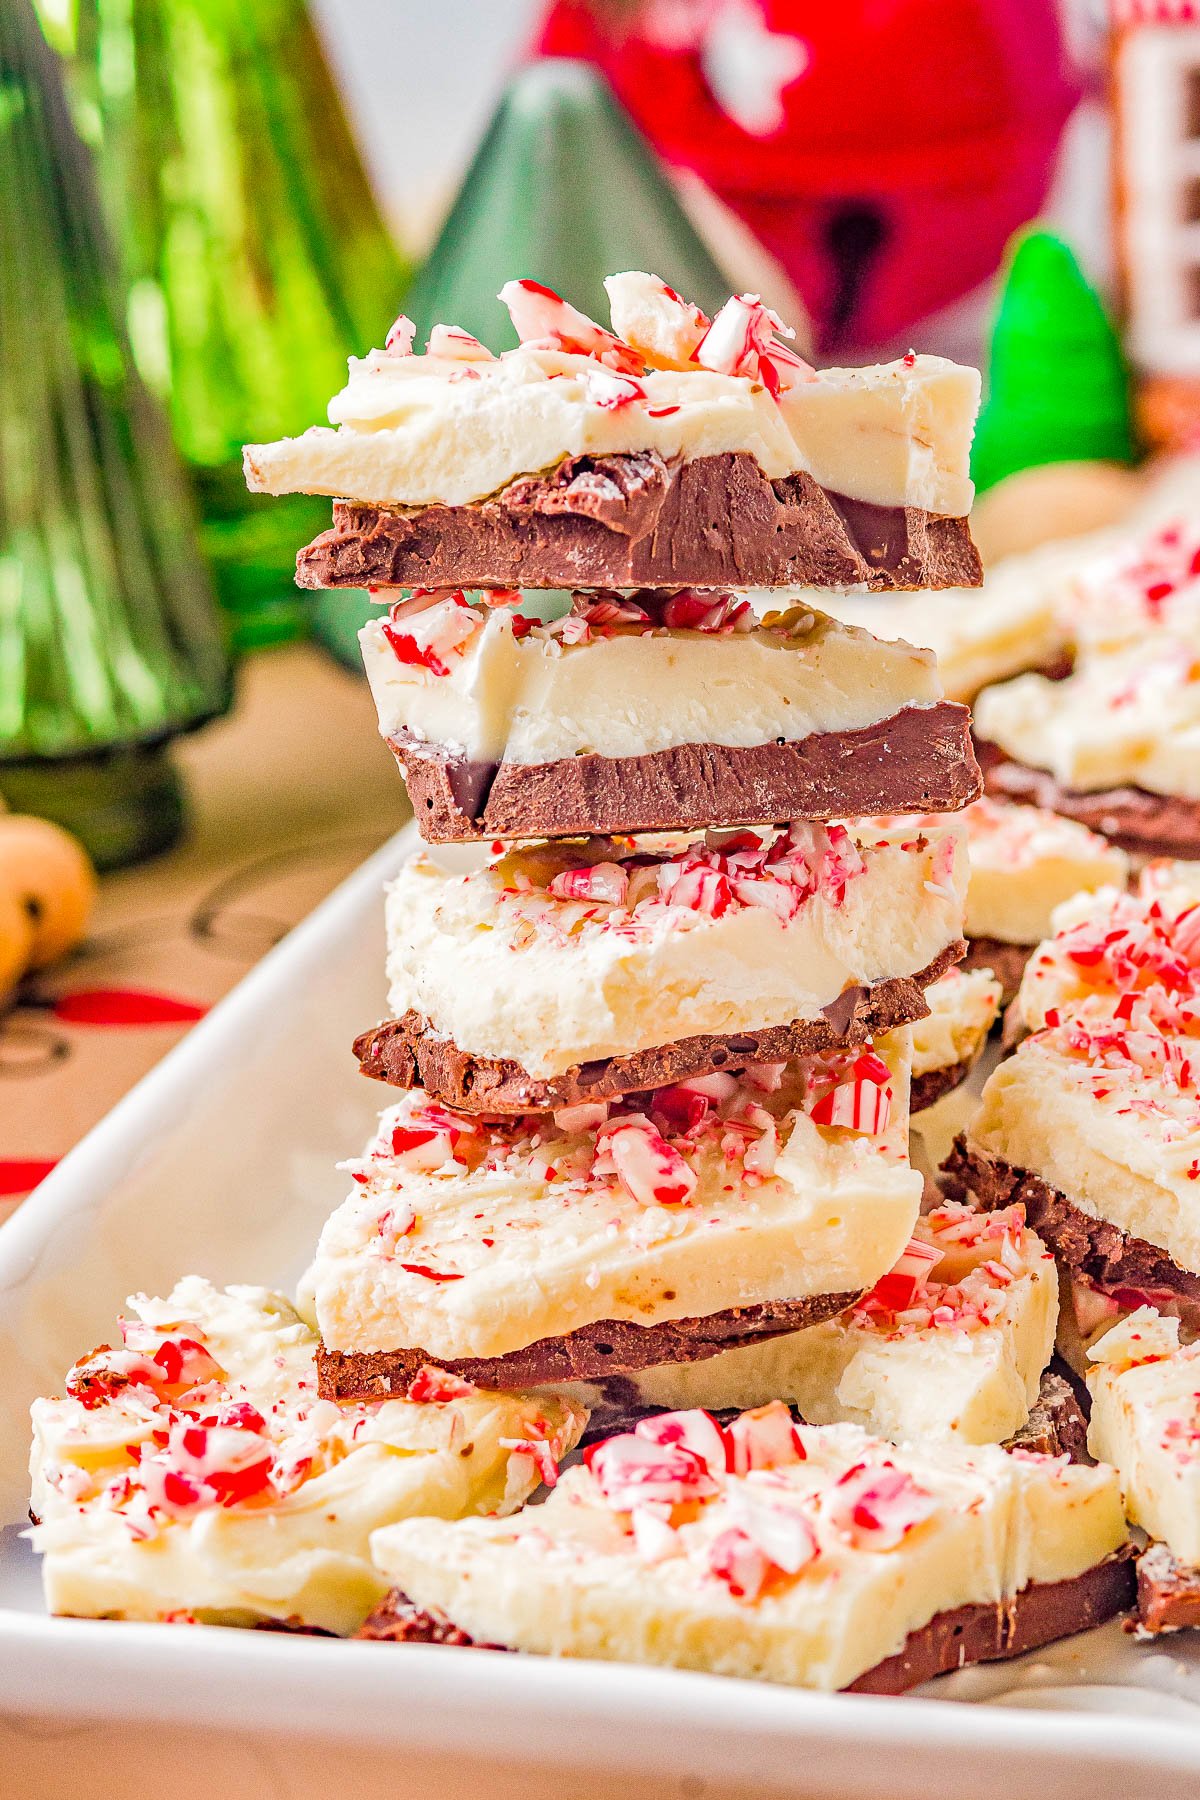
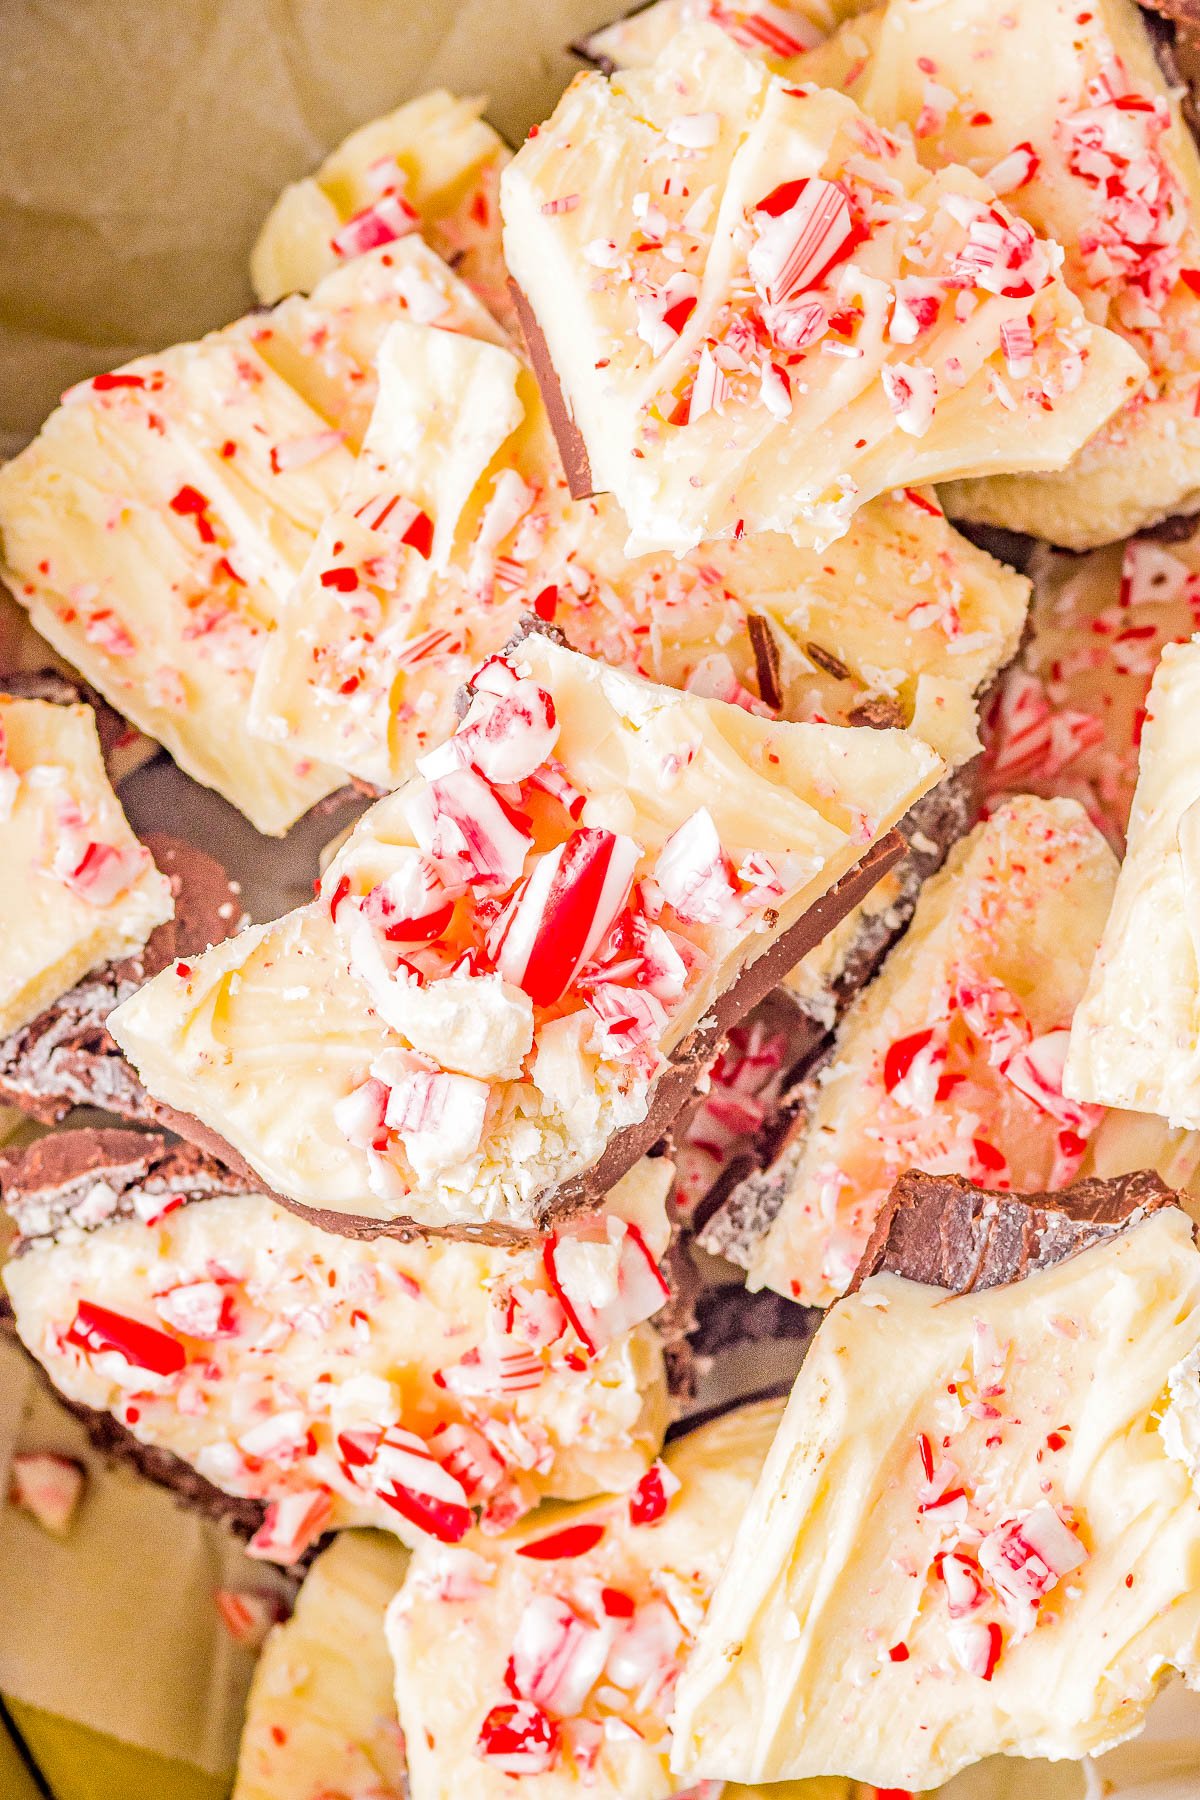
We all can use an easy, no-bake, holiday dessert recipe especially when there are only 4 ingredients in it! That’s right, this homemade peppermint bark has just four ingredients and comes together quickly and easily. But don’t let the fact that there are only four ingredients fool you into thinking that the peppermint bark lacks flavor. Absolutely not! There’s a layer of semi-sweet chocolate that’s topped with white chocolate which has been spiked with peppermint extract.
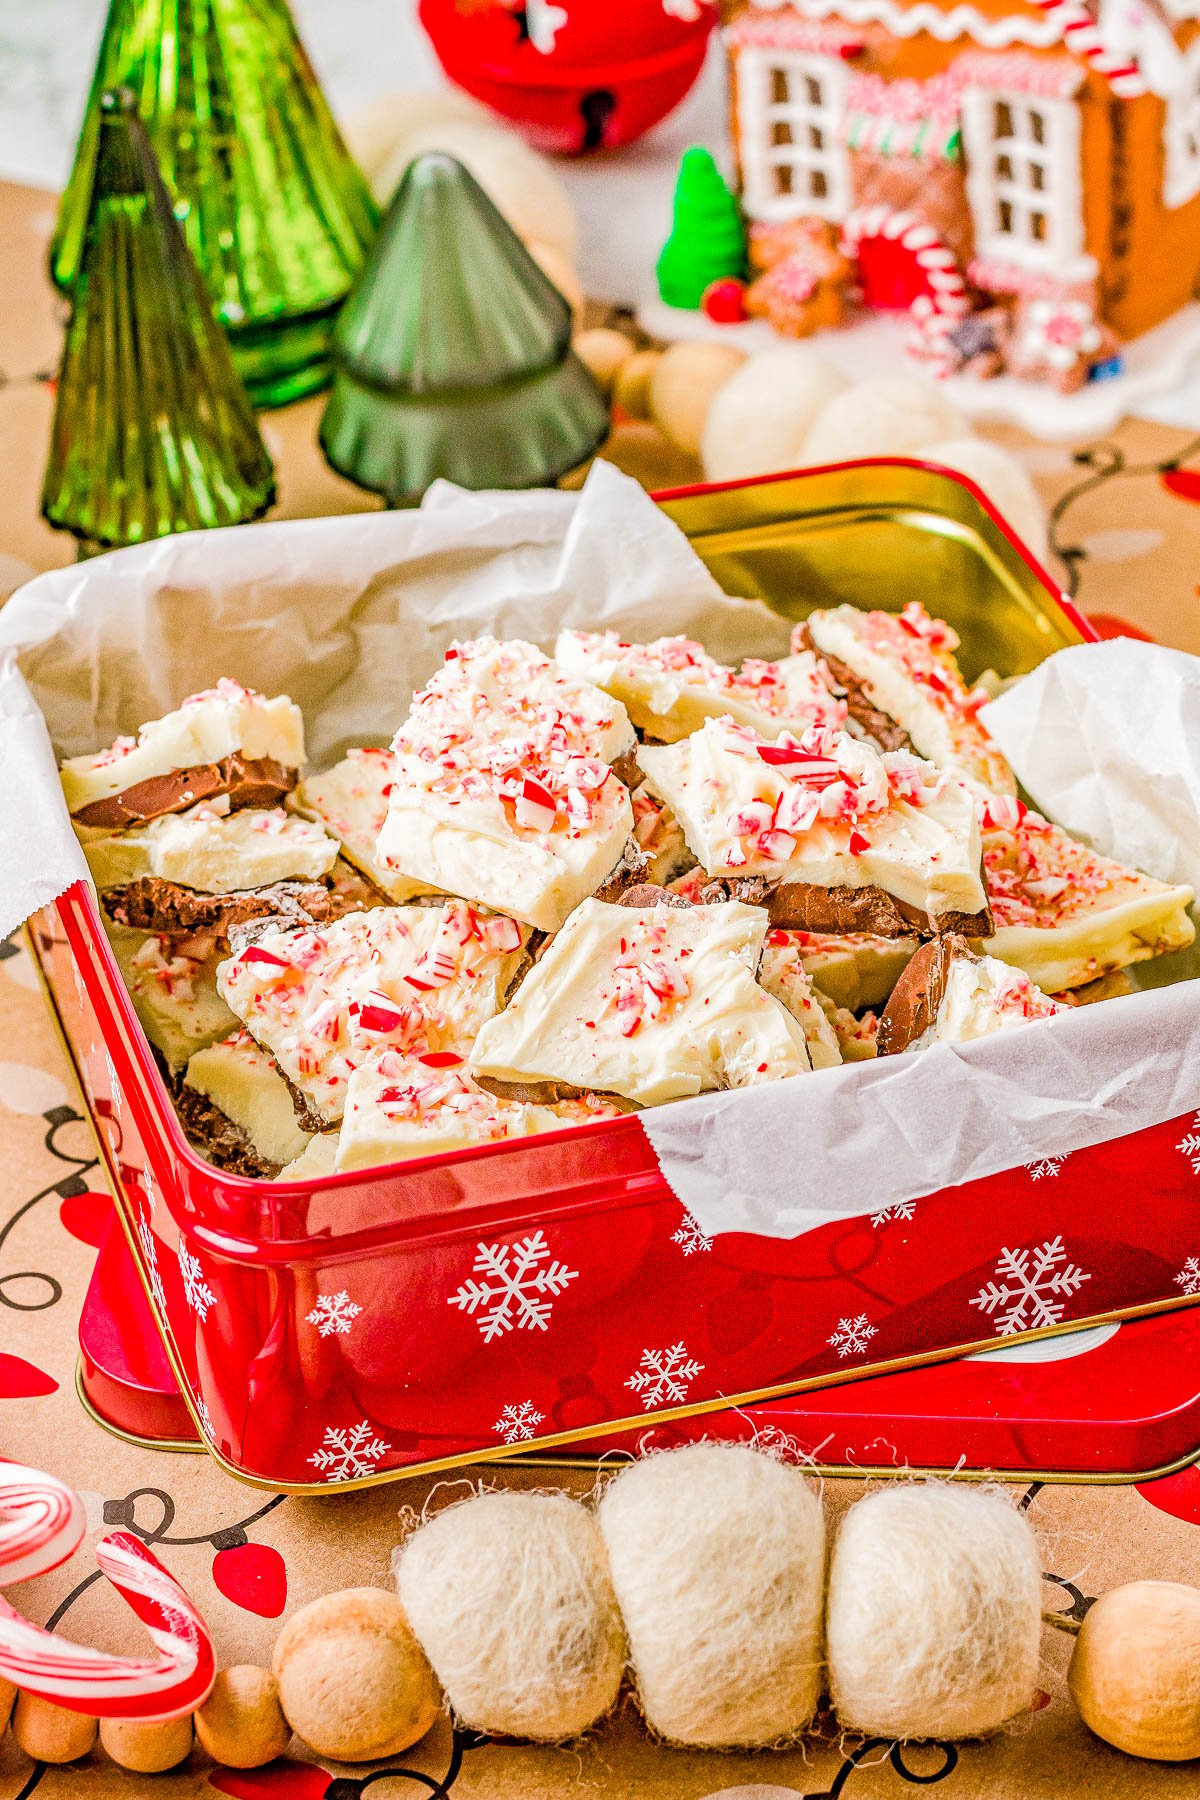
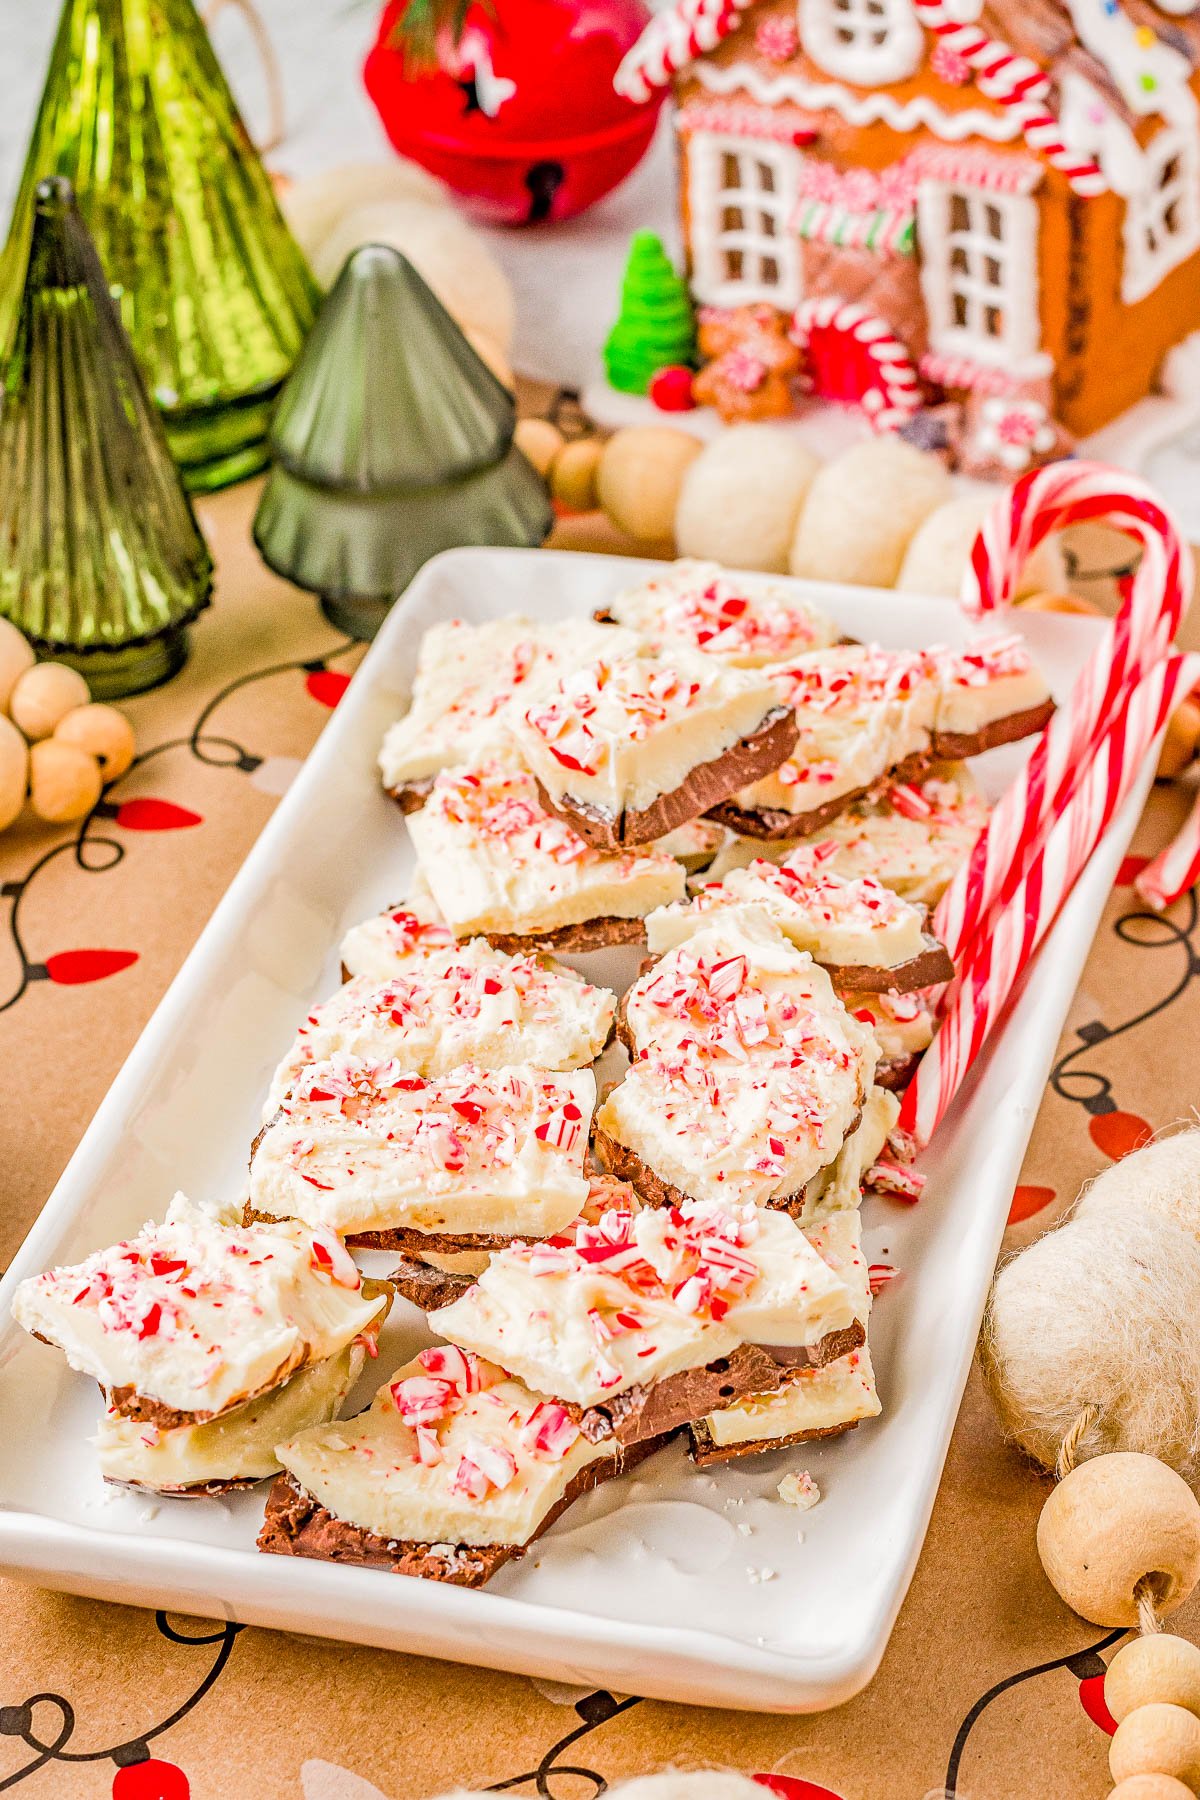
To really boost the peppermint flavor as well as give a festive appearance to this Christmas candy recipe, crushed peppermint candies are sprinkled on top. One of my favorite things about peppermint bark, apart from it’s wonderful pepperminty taste, is that you can make it weeks ahead of time and it tastes just as good later on! Because of that, it’s great to include in cookie exchanges or Christmas treat exchanges, to set out when you’re entertaining for the holidays. Or give it as gifts in the form of hostess gifts, gifts for coworkers, friends and family, teachers, and all those special people in your life.
Ingredients in Homemade Peppermint Bark
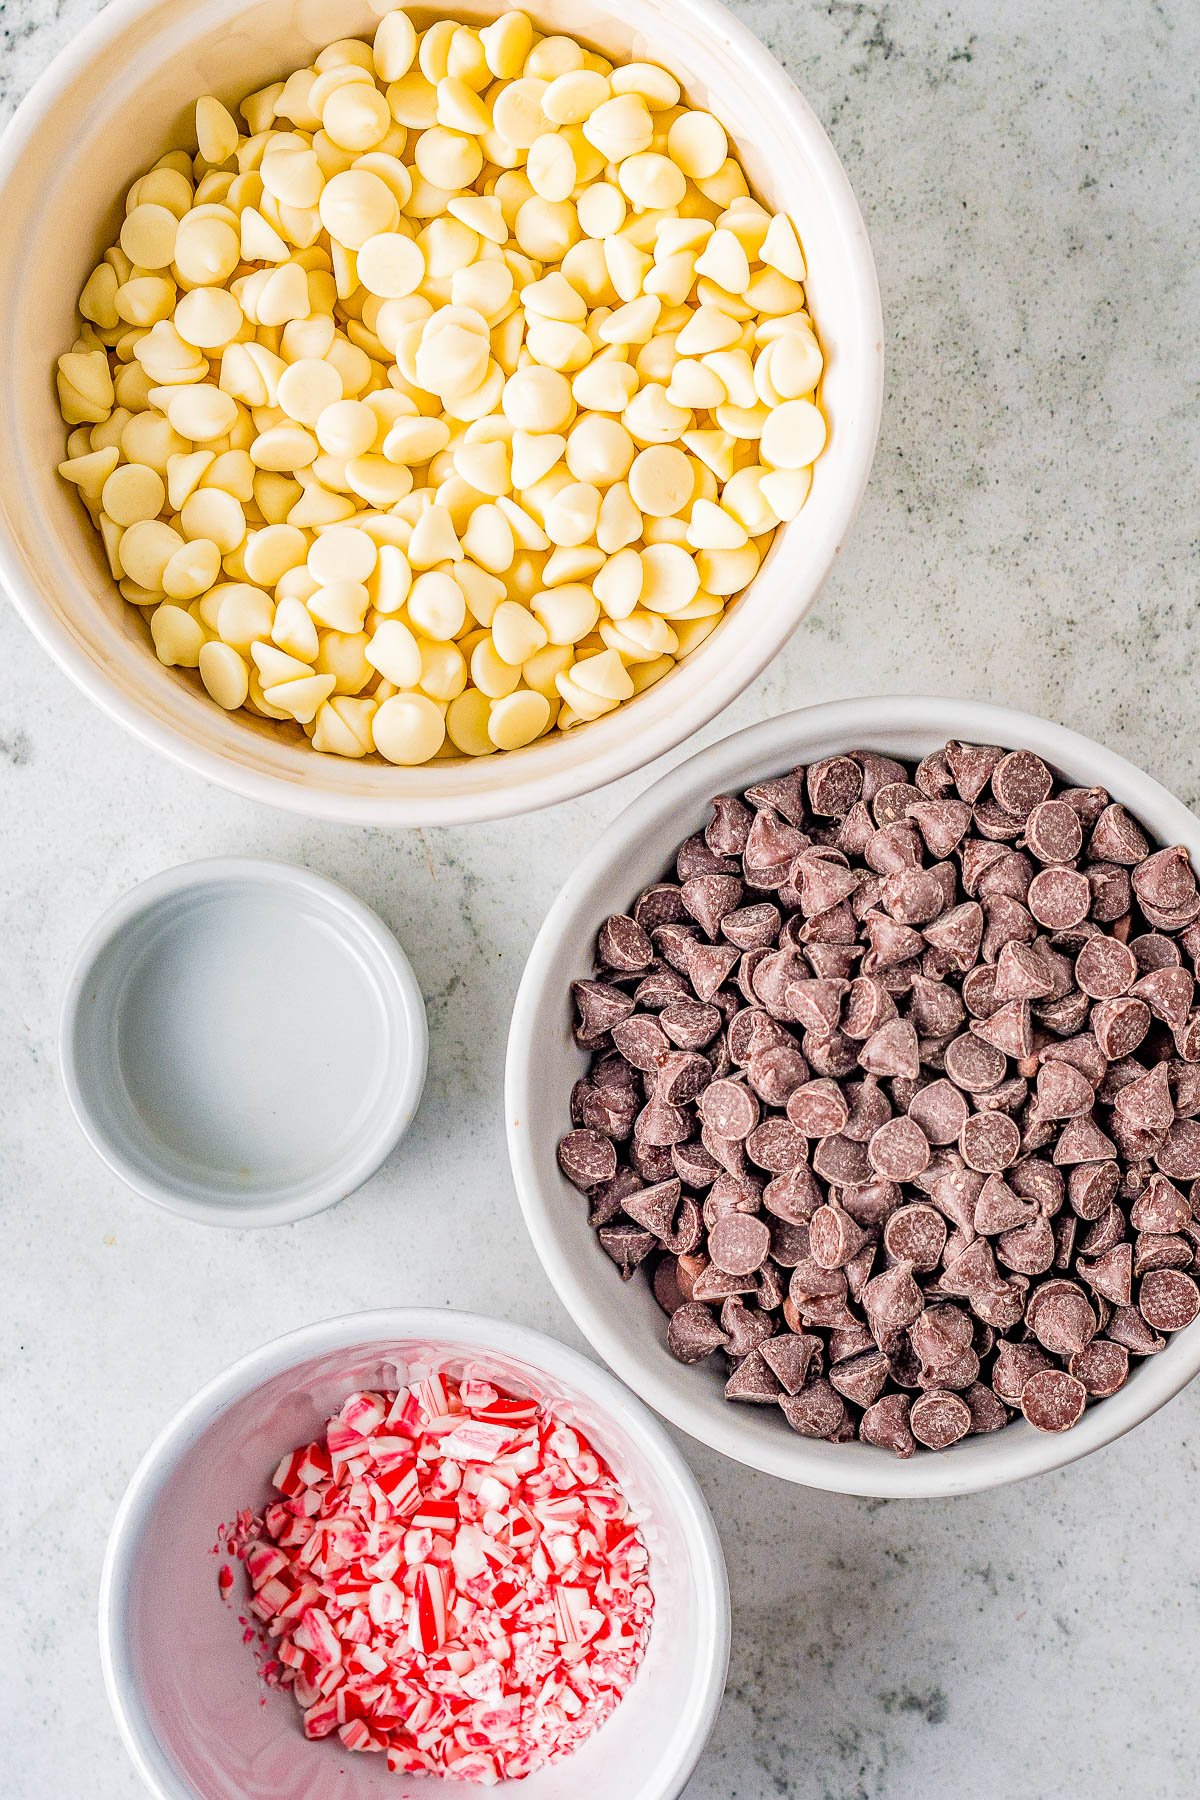
To make this chocolate peppermint bark candy recipe, you only need a handful of ingredients – four to be exact! With so few ingredients, each one really counts, so try to buy the highest quality you can. You’ll need the following items:
Semi-sweet chocolate chips White chocolate chips Peppermint extract Peppermint candies
Note: Scroll down to the recipe card section of the post for the ingredients with amounts included and for more complete directions.
How to Make Peppermint Bark
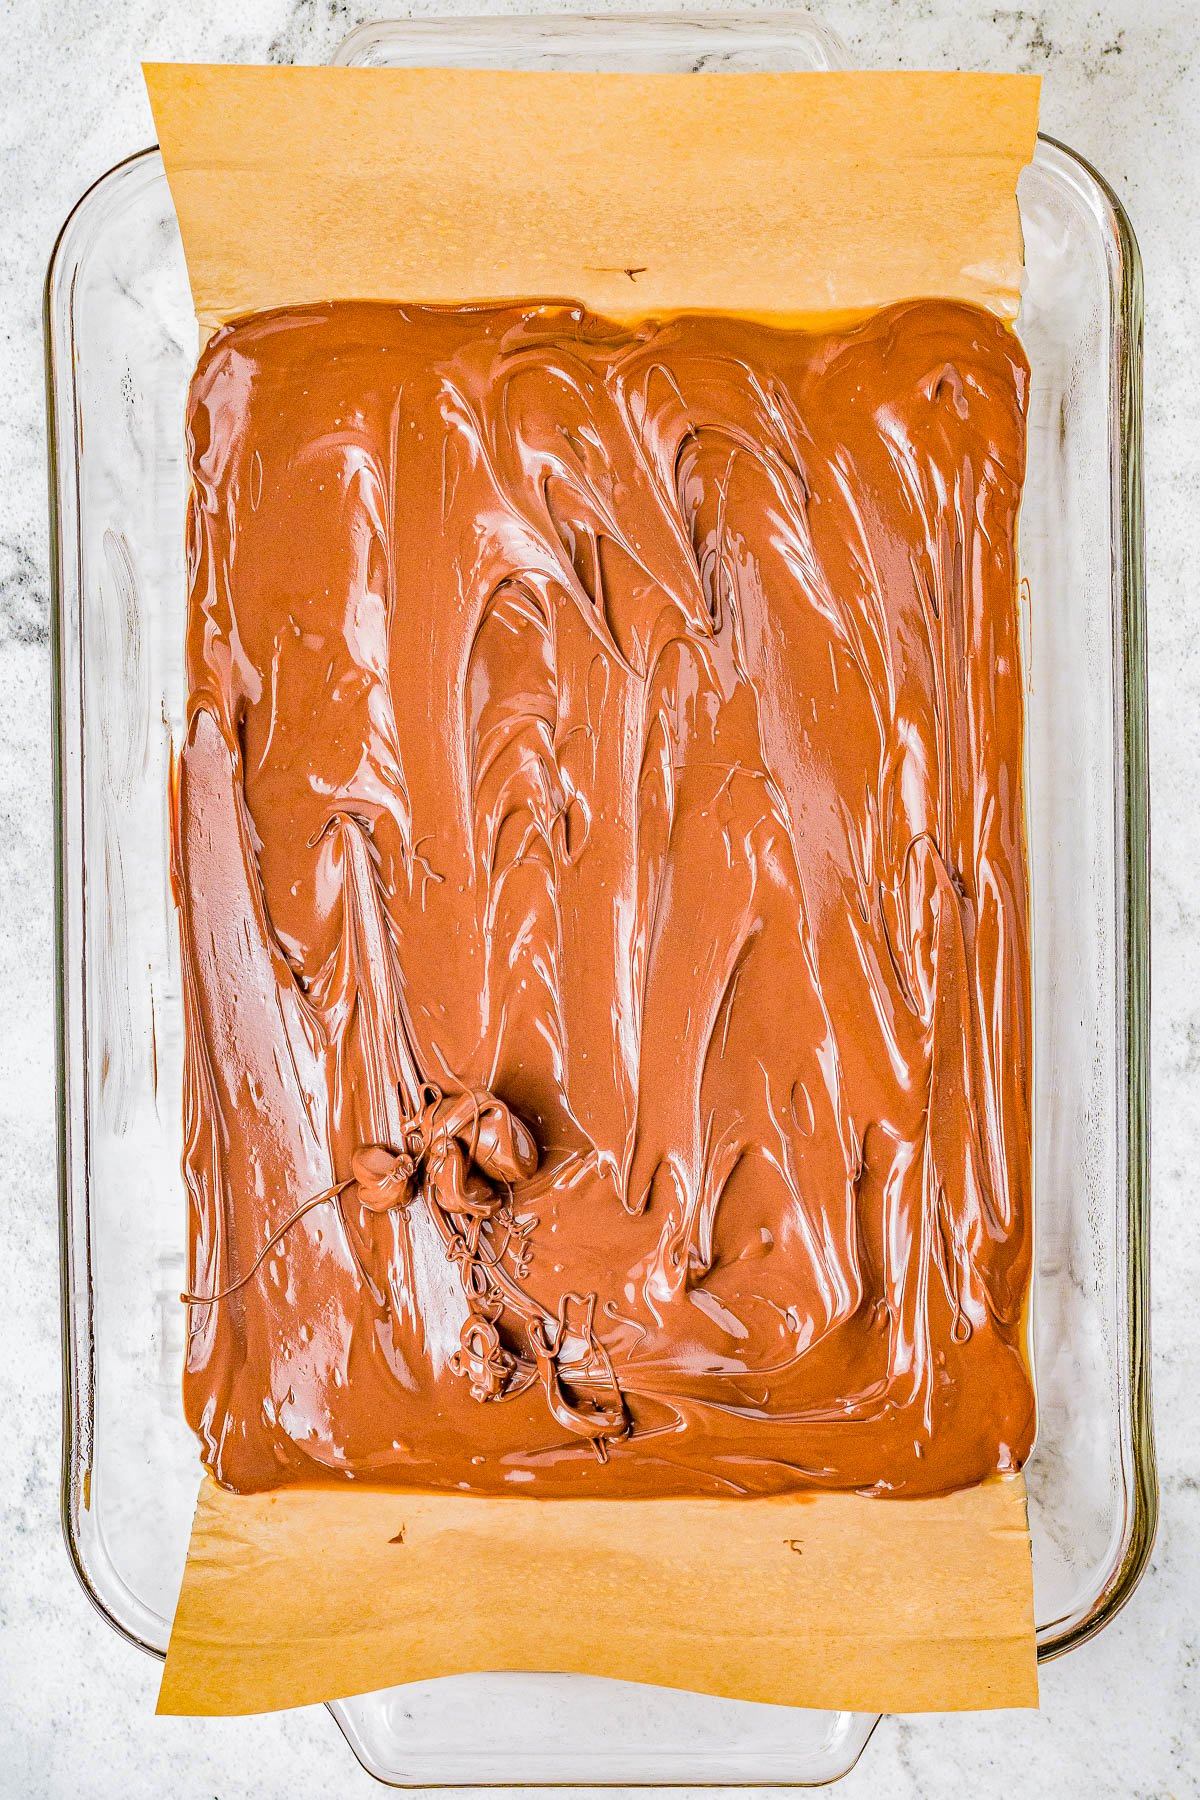
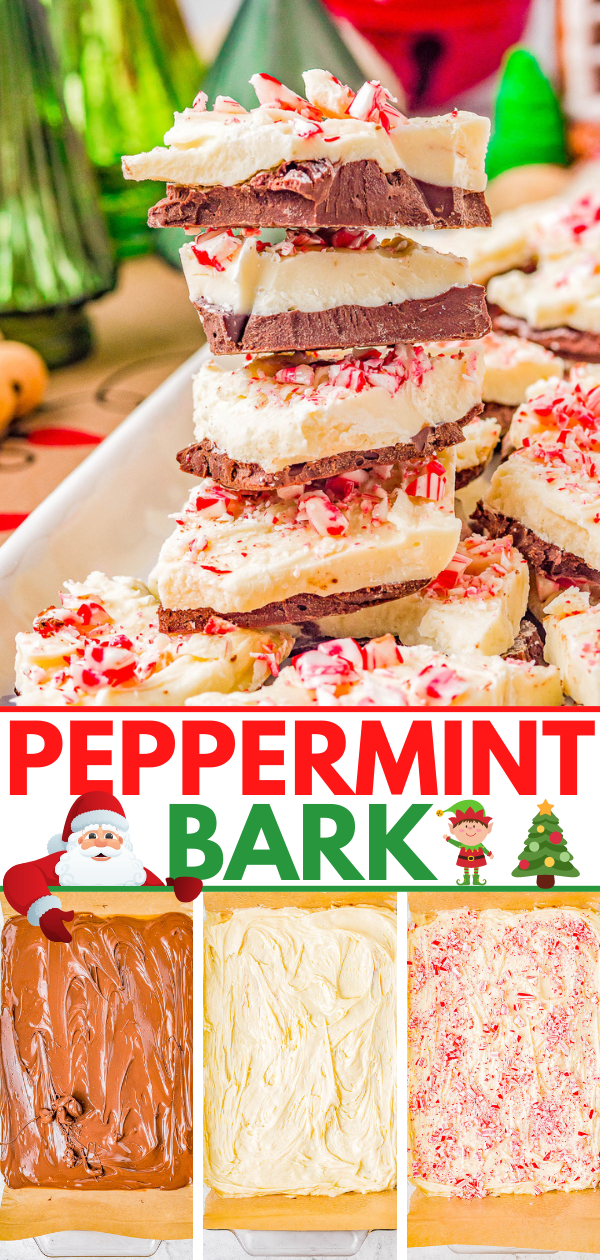
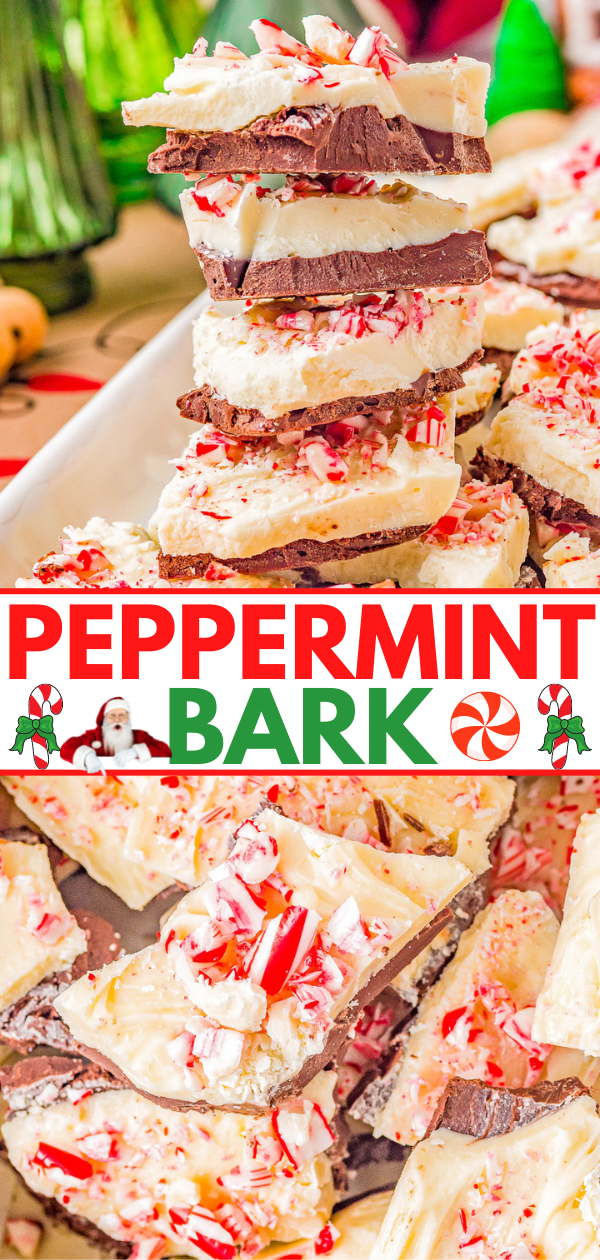
Making Christmas peppermint bark is a cinch! Follow my easy and straightforward directions, and you’ll have this ready in no time. Step 1: Line a 9×13-inch pan with parchment paper and spray with cooking spray. Step 2: Melt the semi sweet chocolate and then spread it over the parchment paper and allow it to set up almost completely before adding the white chocolate. Tip: Add the white chocolate when the semi-sweet chocolate is about 90% set to encourage your bark to “stick together” when you cut or break it.
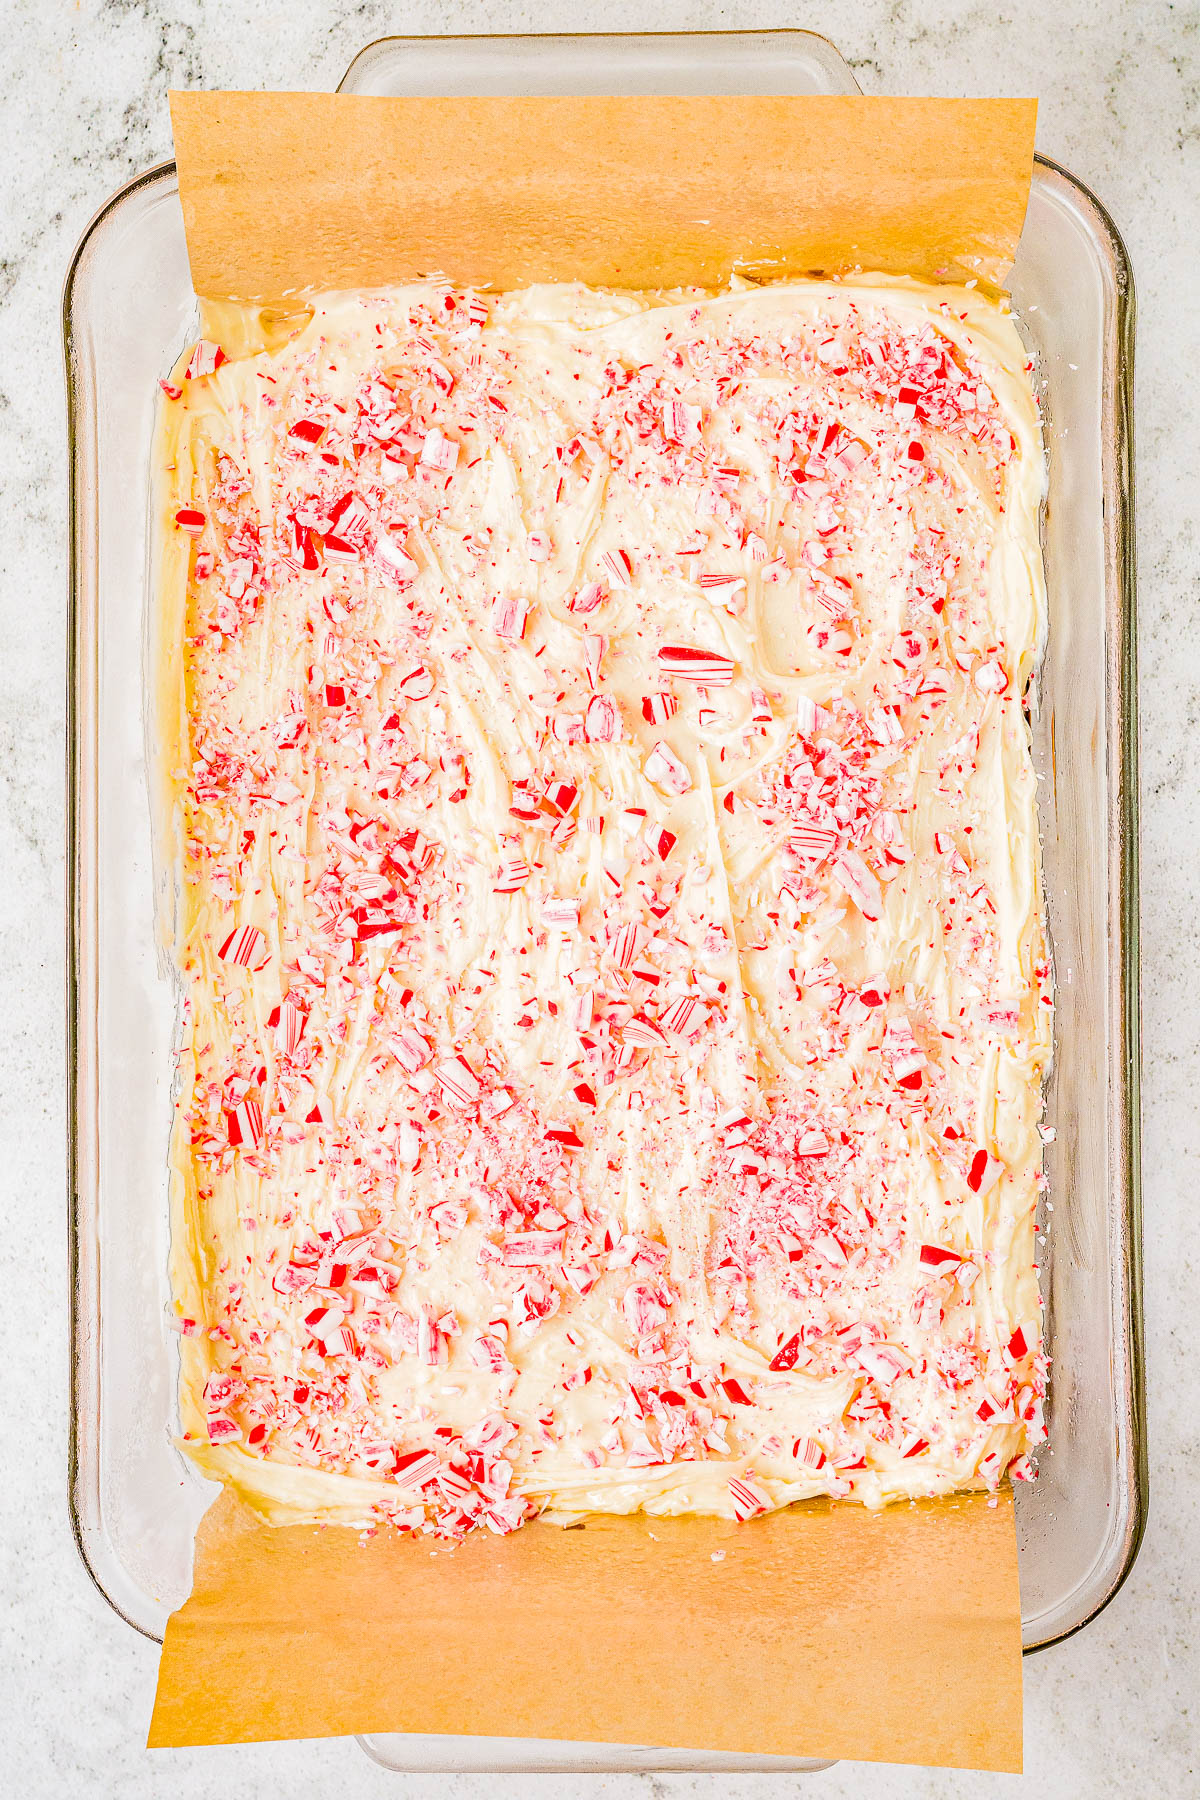
Step 3: Melt the white chocolate. Step 4: Add the peppermint extract and stir to combine before spreading it over the semi-sweet chocolate layer.
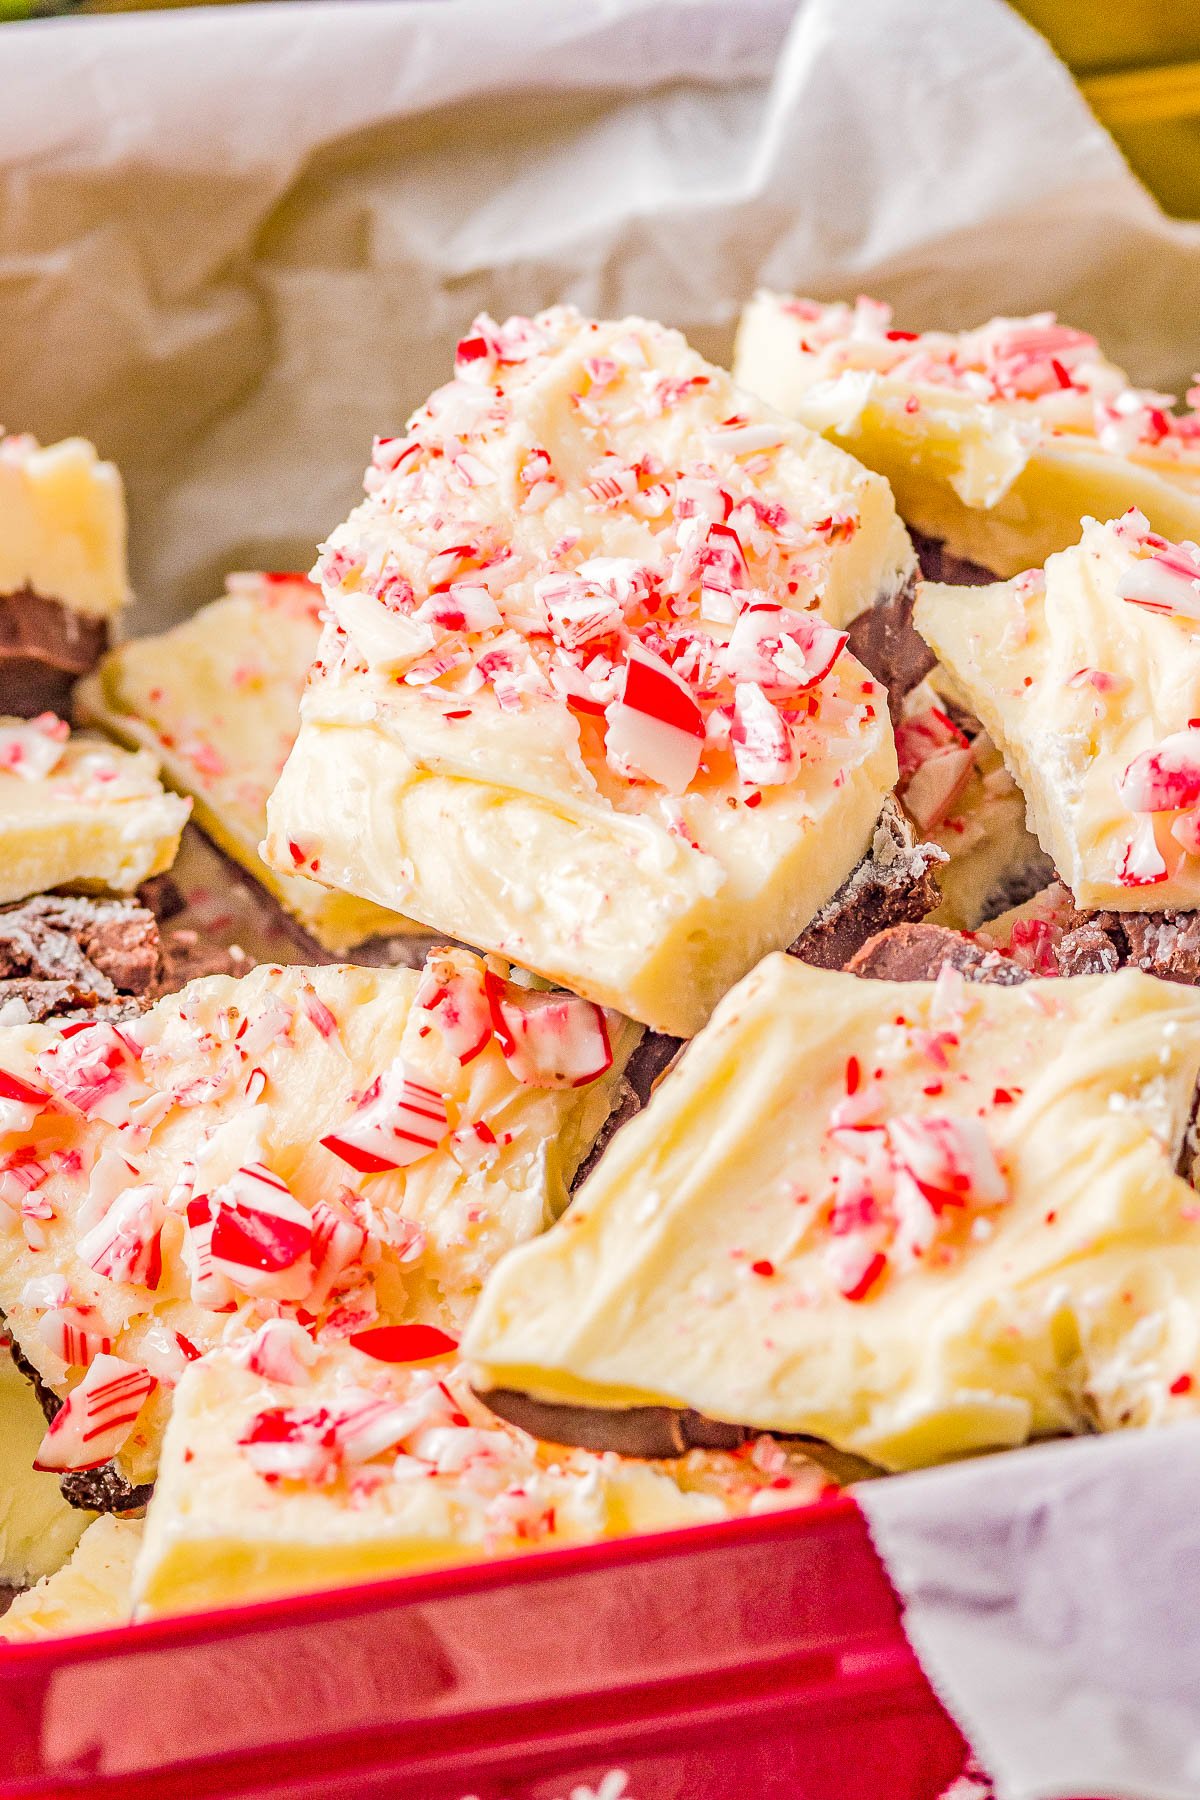
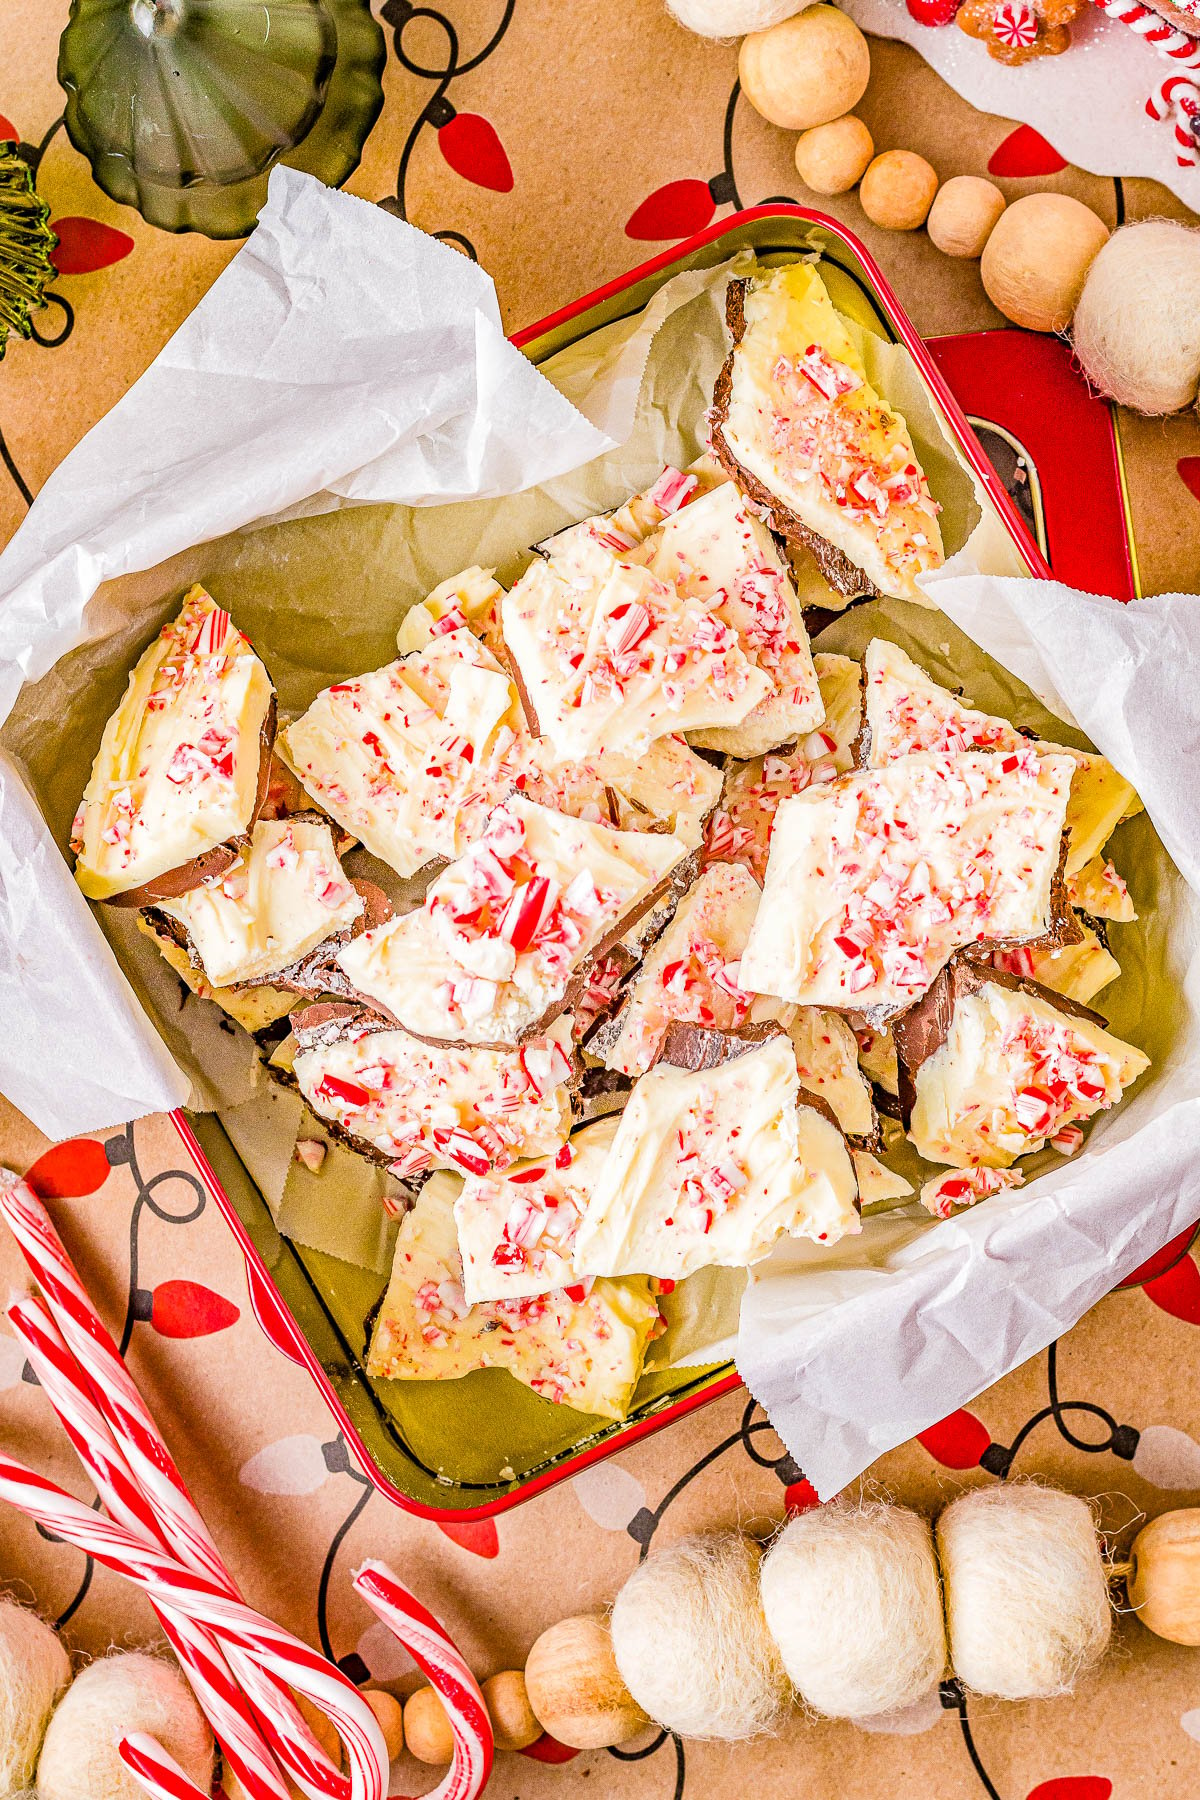
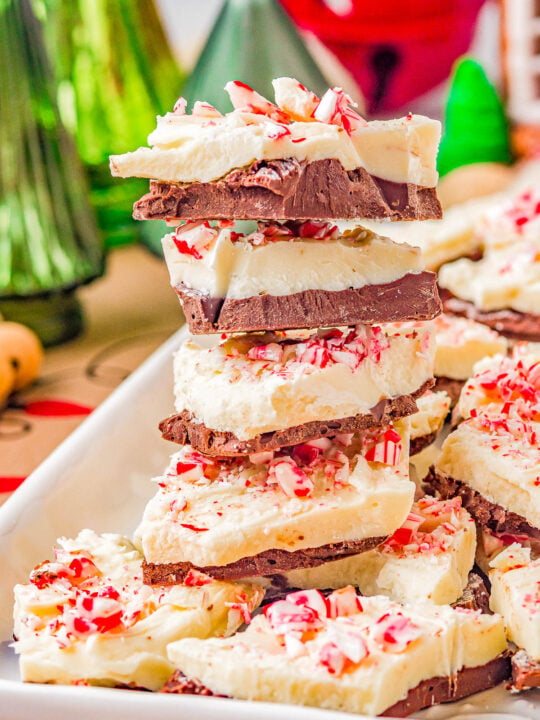
Step 5: Evenly sprinkle with peppermint candies and allow it to fully harden before breaking into pieces and enjoying!
What Kind of Chocolate Should I Use in Peppermint Bark?
For my peppermint bark recipe, I use semi-sweet chocolate chips. If you’re using chocolate chips, make sure that you’re using high-quality chocolate chips that you know will melt smoothly. I have confidence in the Ghirardelli brand for this purpose as well as for the taste. I use their semi-sweet chocolate chips and white chocolate chips. Additionally, you can also use chopped chocolate from a whole chocolate bar. For value, the Trader Joe’s Pound Plus Bars are excellent. I suggest the Dark Chocolate. However, in my area there is no white chocolate option at Trader Joe’s so you can use another brand for the white chocolate bar like Lindt White Chocolate. There are so many options for chocolate on the market, but I would stick with either high-quality chocolate chips or a bar of chocolate that you chop yourself. Tip: Semi-sweet chocolate is more traditional but you can also use milk chocolate for the base layer if you prefer.
How to Melt Chocolate for the Best Peppermint Bark
The easiest way to melt chocolate for the best peppermint bark is to:
Tip: Make sure not to overheat the chocolate! Be very careful when it gets close to the point of being fully melted that you do not continue to (over)heat it because you will scorch it or burn it, it’ll harden and turn into an unsightly rock blob, and you’ll have to start over. Secondarily, you can also melt chocolate by placing it in a heat-safe bowl, such as a glass bowl, placed the bowl over a wpot on the stove with boiling water in it, and allow the heat below from the hot water to melt the chocolate as you stir it continuously. This double boiler method of melting chocolate is more old-fashioned in my opinion, and most people will find using a microwave is more convenient.
Are Peppermint Extract and Peppermint Oil The Same?
No, they are not! For this recipe, select peppermint extract. Do not select peppermint oil because they are not the same. Peppermint oil is much more concentrated than peppermint extract, and you would need less than even the 1 teaspoon of peppermint extract called for. Tip: Make sure to actually use a teaspoon measurement and do not eyeball it and just dump your peppermint extract into the melted chocolate. Peppermint extract is very potent, much more potent than vanilla extract (which I do eyeball), so I highly suggest using an actual teaspoon, so that you do not accidentally add too much and overwhelm the chocolate.
Peppermint Candy Toppings for This Recipe
When you’re making peppermint bark for the holiday season, you’ve got a few choices for the peppermint candy toppings: The final option is my favorite to save time and energy. And if you have any leftover make Double Chocolate Peppermint Sandwich Cookies with them! However, if you do decide to crush your own peppermint candies or candy canes, I find it easiest to put them in a large, zip top bag, and somewhat gently roll over them with a rolling pin until you’ve broken them up enough but not turned them into dust nor ripped the bag.
Storage Suggestions for Homemade Peppermint Bark
Chocolate keeps for months and months, and that’s all we’re really working with here are two types of melted chocolate with crushed peppermints on top. Therefore, I can confidently say that this will easily keep at room temperature for 1 month, and likely much longer. Although it’s another story if you’ll actually have any after a month because it’s so tempting to snack on! There’s really no reason to store your peppermint bark in the refrigerator. Apart from that, it could actually make it overly hard. You don’t want to break a tooth! I’m sure it will easily keep for 4 to 6 months in the freezer if you want to test it out although I never have.
How to Make Sure The Two Chocolate Layers Stick Together When You Cut Peppermint Bark
This is a pesky problem that can happen anytime you are trying to marry two types of chocolate together, but I have some tips and tricks to make sure they stick together like glue! For peppermint bark that resists separating or not sticking together when you cut it:
If the semi-sweet chocolate is almost hardened, but not quite to the point of being fully and completely set, when you pour the white chocolate over it, this will encourage the two layers to “marry” and ultimately stick together when cutting or slicing. BUT make sure though that it’s almost set. If not, you’ll end up with a swirly bark and while the taste will be fine, it won’t resemble classic peppermint bark. Use high quality chocolate (Semi-sweet chocolate chips and White chocolate chips) which I’ve mentioned already. Some people advise against using anything with palm oil. Others suggest that bar chocolate is necessary but I don’t find that to be the case and that quality chocolate chips work just fine. DO NOT try to speed up the process of allowing the bark to fully set up and harden by placing the pan in the freezer (nor the fridge). Upon thawing, condensation will be produced, and this moisture will prevent the layers from bonding and sticking together.
Tips for the Best Peppermint Bark
Making your own chocolate peppermint bark is an easy holiday Christmas candy recipe but I’ve got a few parting tips to make sure your bark turns out festive and wonderful! High Quality Chocolate – As I mentioned, for both ease of melting and the taste, and because there are so few ingredients in this candy recipe, make sure to use high quality brands of both the semi-sweet and the white chocolate. Melting the Chocolate – The number one rule of melting chocolate is not to overheat it. Pay very close attention when it gets close to the point of being fully melted that you do not continue to cook it either in the microwave or over a double boiler. When about 80% of your chocolate has melted, the carryover heat from that chocolate will probably melt the remaining unmelted chocolate as you’re trying to stir it smooth. Be mindful to only heat it as much as necessary. There’s nothing more frustrating than scorched chocolate because it hardens up, you cannot save it, and you have to start over. Chocolate is expensive and it feels horrible to toss a pound of chocolate out but unfortunately I’ve done it many times in my (novice) baking life – don’t be like me!
Chilling the Chocolate – After you poured the base layer of melted semi-sweet chocolate into the pan, make sure that it has set up fully before moving on to add the white chocolate. 15 minutes in the refrigerator is probably all that it will take. Ratio of Chocolate – I use slightly more white chocolate than semi sweet chocolate, but you can use equal ratios, or reverse the ratios and use more semi-sweet than white, based on your personal taste preferences. Making Thicker Bark – If you want extra-thick bark, rather than using a 9×13-inch pan like I did for this holiday bark recipe, you can use a 9×9-inch pan and it’ll be thicker. Doubling or Halving the Recipe – To double the recipe, double everything and use two 9×13-inch pan. To halve the recipe, halve everything and use one 8×8-inch pan.
Peppermint Extract – Don’t confuse peppermint extract with peppermint oil. You want peppermint extract for this recipe. There are many brands on the market, but for the most part you can feel safe choosing a store or generic brand for your extract to save a bit of money. Peppermint Candies – Save time and energy by buying already crushed peppermint candies. Make Ahead – Homemade gifts just got a whole lot easier because this peppermint bark is the epitome of a make ahead holiday food gift. Because peppermint bark will easily keep for a month at room temperature, you can go ahead and get started on this immediately and feel free to drop it in a festive cellophane baggie and give it for New Year’s Eve hostess gifts, and any time in between that you need a thoughtful little gift for a coworker, friend, teacher, or someone special. Sticking Together – Read the above section for tricks to help the layers stick together. It really isn’t tricky but make sure add the white chocolate just before the milk chocolate has fully set up. And don’t put the pan in the fridge or freezer to rush the setting up process. Condensation will form and the layers won’t stick.
More Easy Christmas Dessert Recipes:
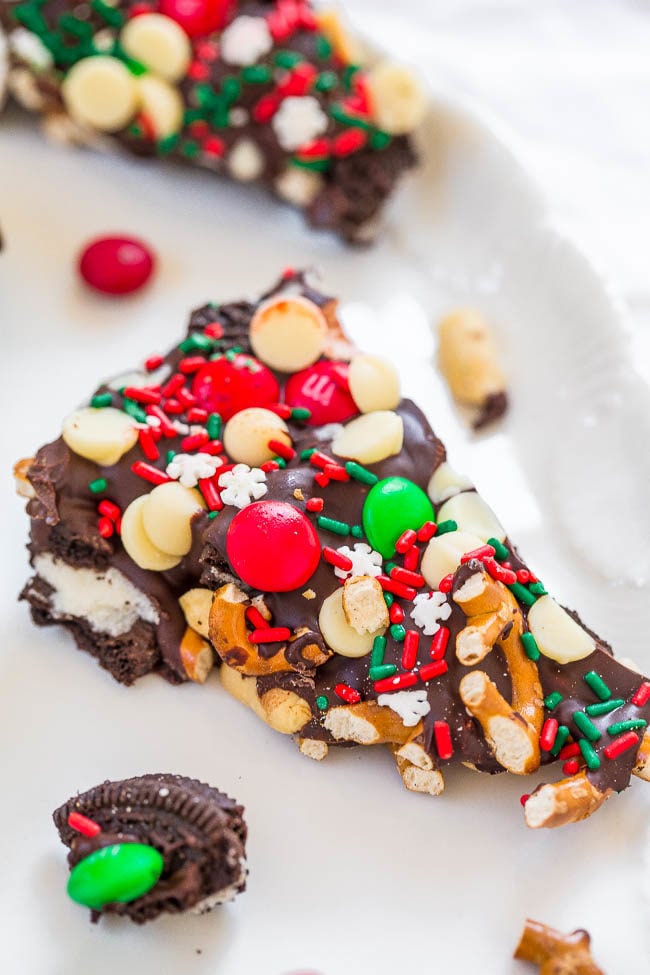
Loaded Christmas Bark – This easy, no-bake chocolate bark is loaded with goodies! Oreos, M&M’s, peanuts, pretzels, and sprinkles! Great for holiday parties and cookie exchanges! Salty, sweet, and addictively good! Tried this recipe? Leave a review! Consider leaving a 5 star rating if you’ve made and loved one of my recipes!
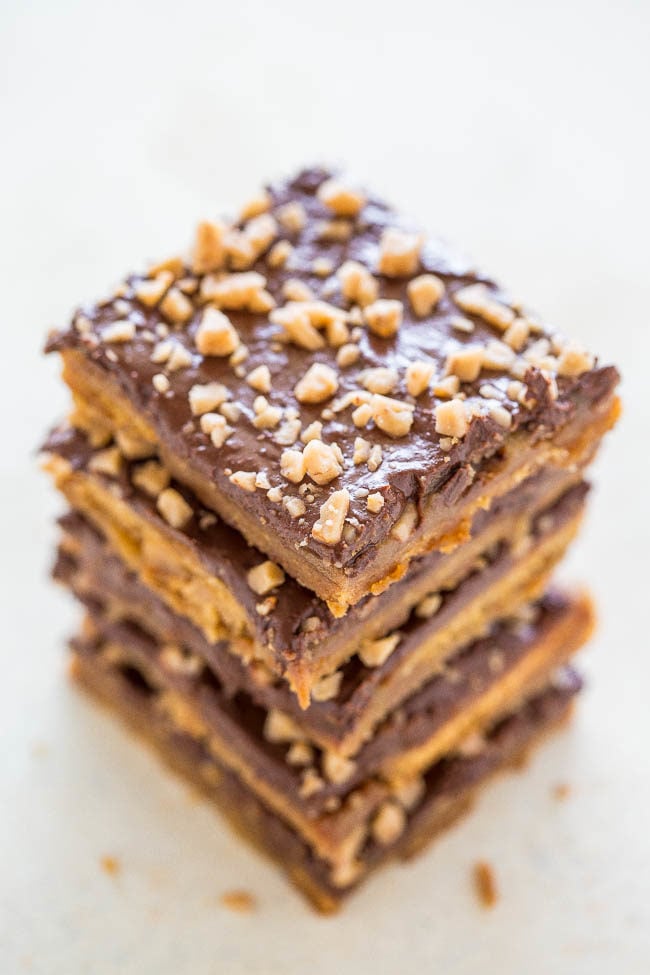
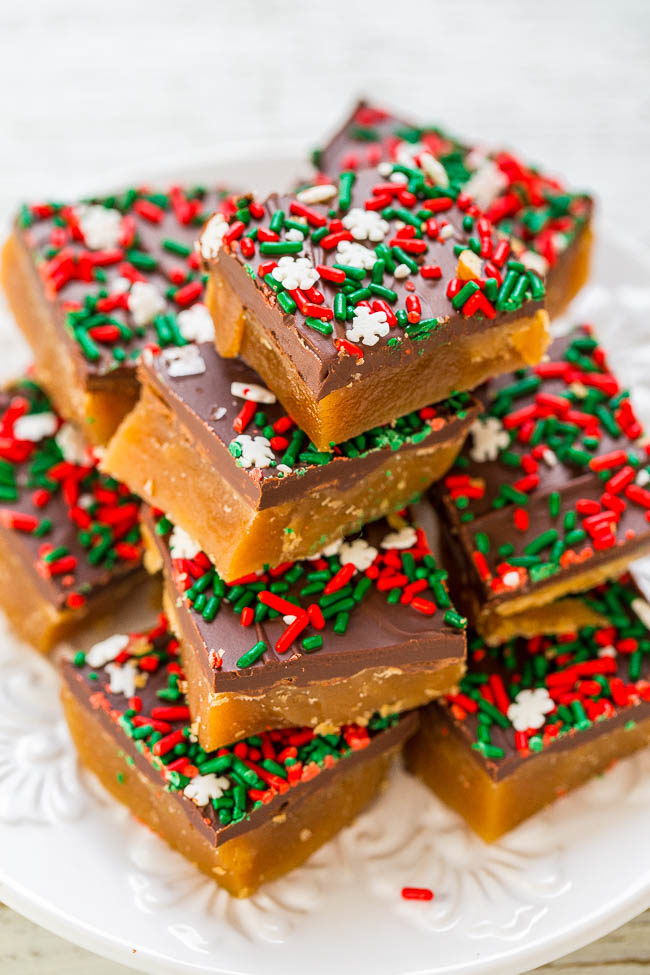
Graham Cracker Toffee (aka Graham Cracker CRACK) – Sweet, buttery, caramely, perfectly chocolaty, topped with toffee bits for extra crunch! Lives up to its name and extremely addictive! An easy holiday and party fave!
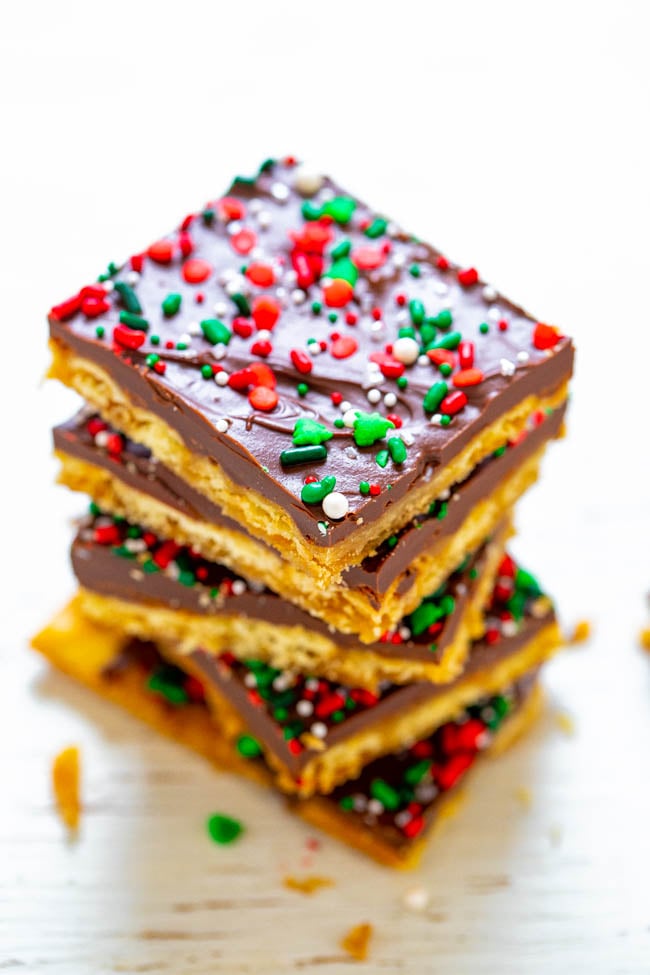
Easy Christmas Crack – A highly addictive, salty-sweet, crunchy, EASY Christmas treat that’s IRRESISTIBLE!! Great for gifts and cookie exchanges because it stays fresh and everyone LOVES IT!!
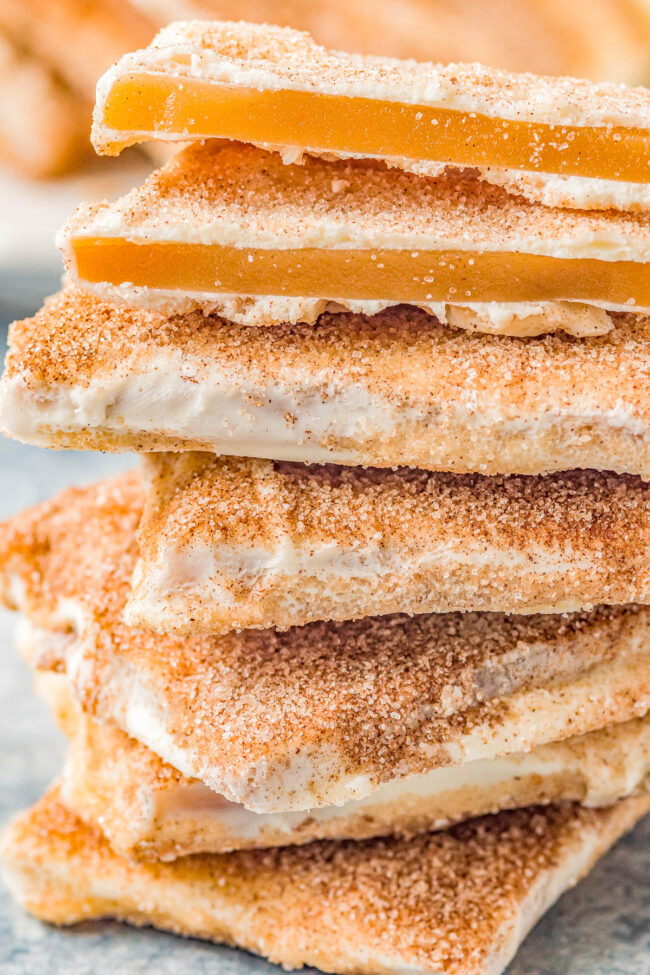
Churro Toffee (Disneyland Copycat) – This Disneyland copycat recipe might be even more delicious than the real deal! Buttery, crunchy toffee is coated in sweet white chocolate that’s dusted with a scrumptious combination of cinnamon and sugar for an irresistible churro flavor sensation! Just one bite of this homemade candy will make you feel like you’re strolling right down Main Street!
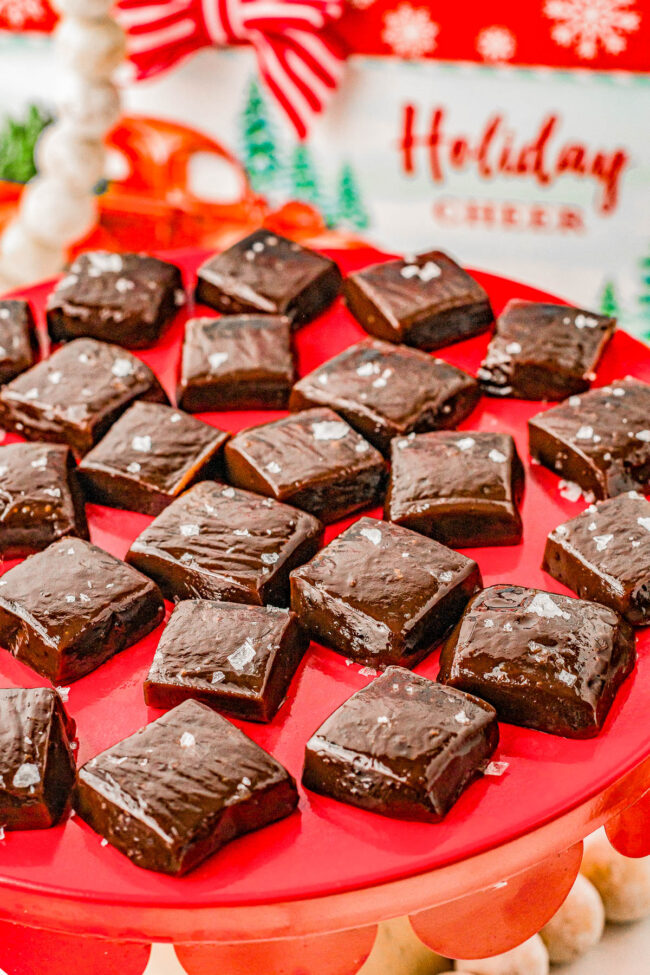
Chocolate Caramels – Soft and chewy, nice and chocolaty, with the slightest hint of espresso flavor that makes the chocolate flavor even richer! A final pinch of flaky sea salt is optional but AMAZING! This EASY Christmas candy recipe is suitable for novices and is great for gift giving, holiday cookie exchanges, and all of your holiday entertaining needs!
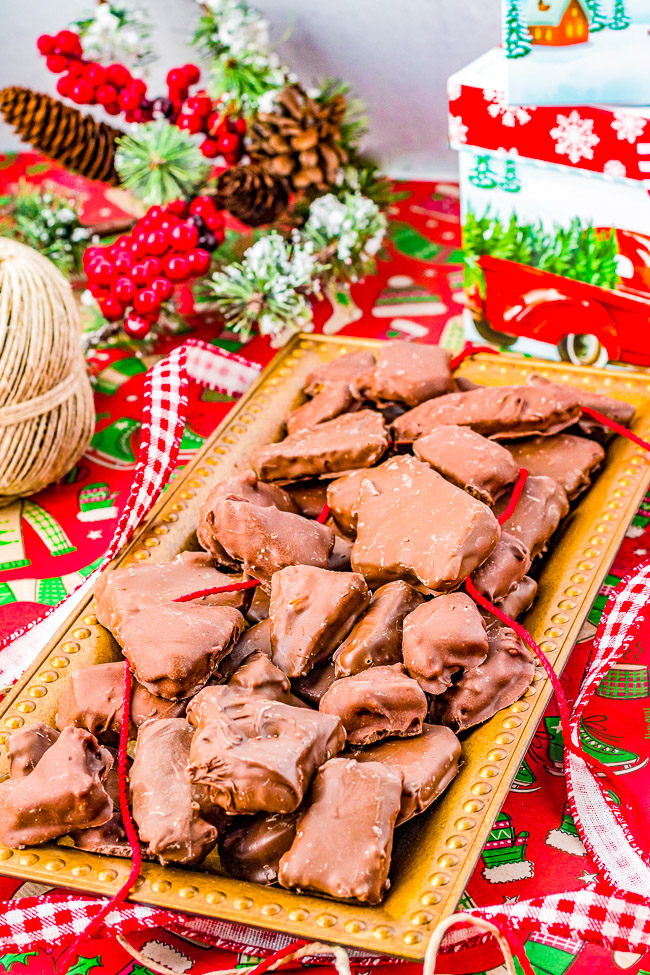
Melt In Your Mouth Toffee – Irresistible, buttery, ADDICTIVE, and just melts in your mouth!! EASY and perfect for holiday parties, gift-giving, or cookie exchanges!!
Chocolate Covered Sponge Candy – A classic homemade Christmas candy that’s light and airy candy inside and chocolate-dipped on the outside. Easy to make! Great for cookie exchanges and hostess gifts because it keeps fresh for a long time!
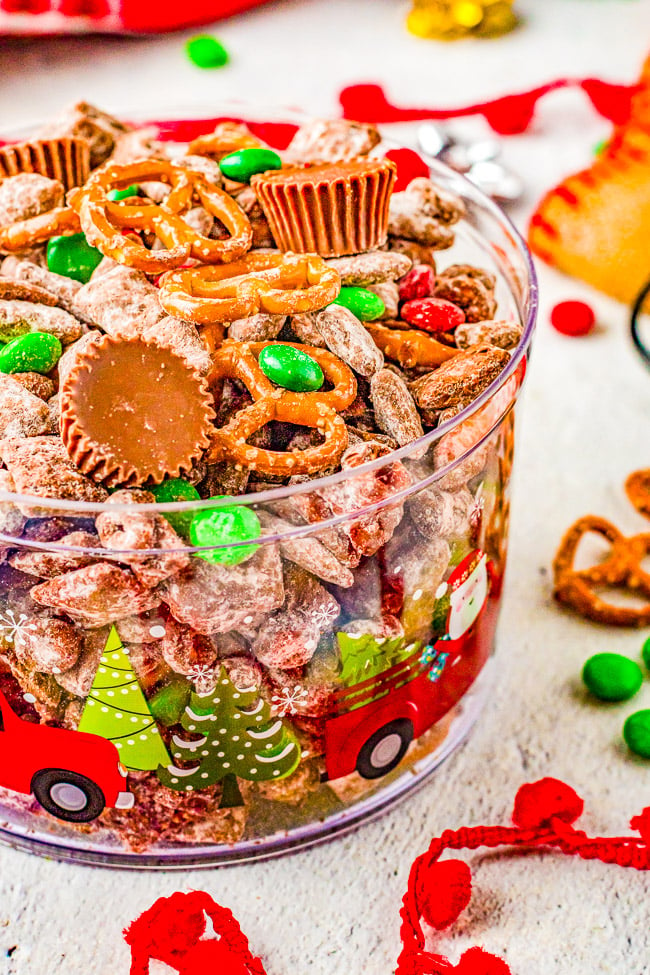
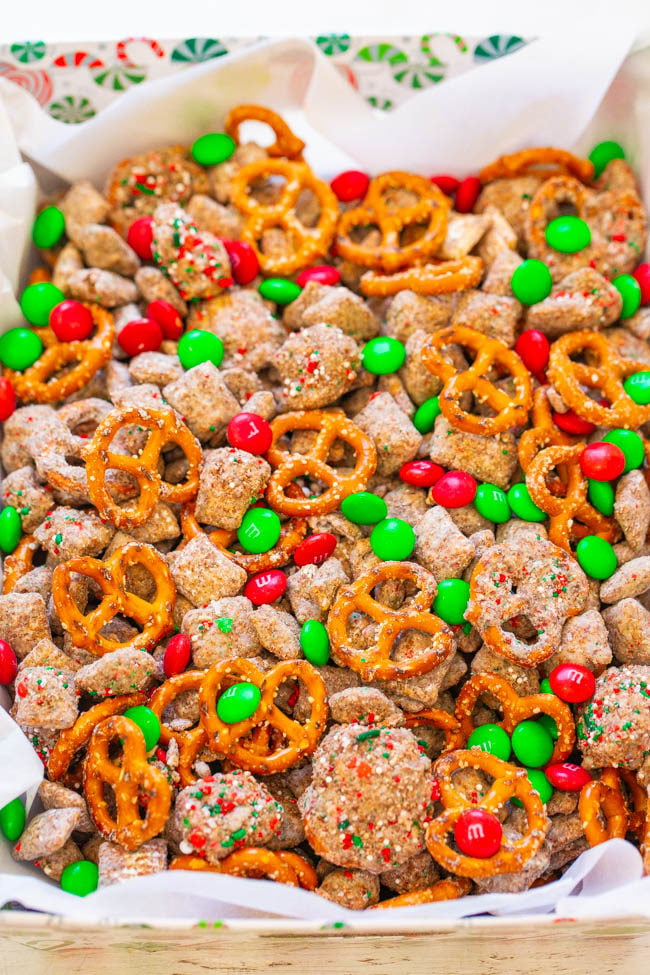
Loaded Christmas Puppy Chow – This fast, easy, no-bake holiday treat is LOADED with all the good stuff! Chocolate, peanut butter, sugar, M&Ms, peanut butter cups, and pretzels for a salty-sweet, crunchy, and addictive snack! Makes great little gifts because it keeps well and everyone LOVES it!
Reindeer Chow – A holiday twist on classic Muddy Buddies that’s EASY, ready in 15 minutes, and perfect for hostess gifts or cookie exchanges!! Chex, chocolate, peanut butter, pretzels, M&M’s, and sprinkles make this dessert snack mix totally IRRESISTIBLE!!
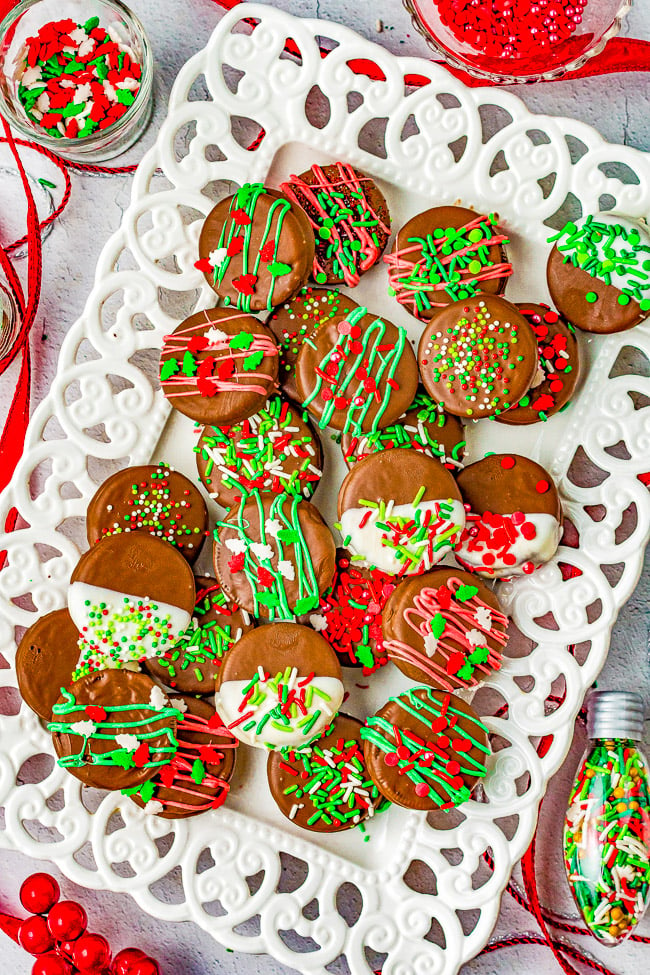
Christmas Chocolate-Covered Oreos — Oreo cookies dipped in chocolate and loaded with sprinkles are an irresistible holiday treat! Fast, EASY, no-bake, can be made in advance! Perfect for cookie exchanges and hostess gifts. Get ready to break out the sprinkles and have fun making and then eating these family favorite Christmas cookies!
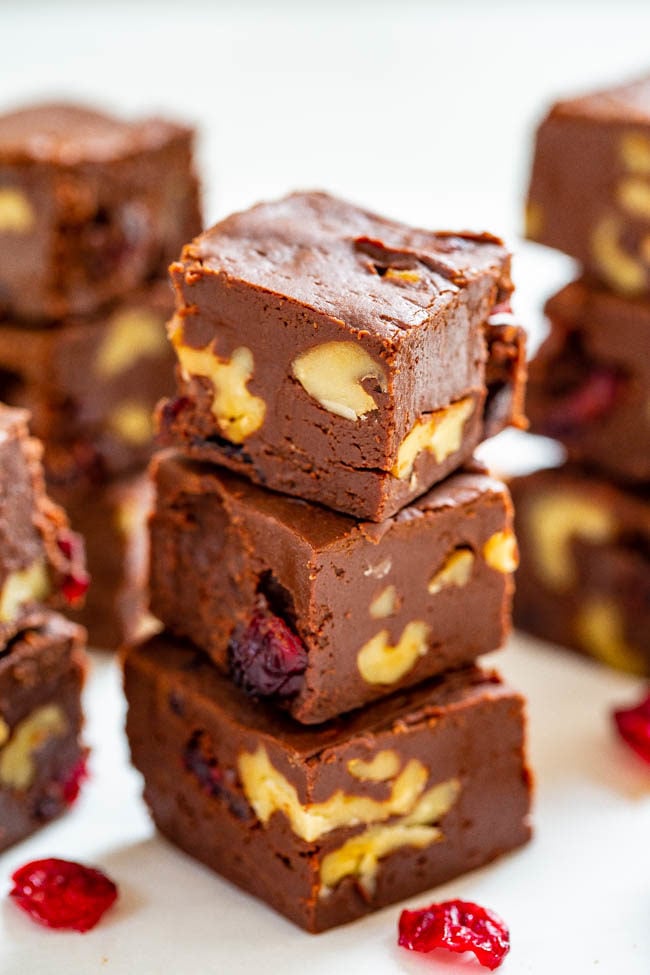
The Easiest Foolproof Fudge – Look no further than this recipe for the EASIEST and most FOOLPROOF fudge that takes less than 3 minutes to make!! Customize it with your favorite add-ins like cranberries and walnuts! Great for gifts and cookie exchanges!!