This is one of those recipes where people will FOR SURE ask for the recipe. Kind of like with this Rocky Road Fudge and these easy homemade truffles!
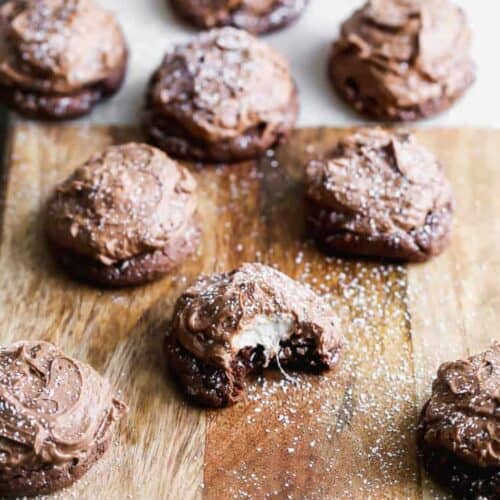
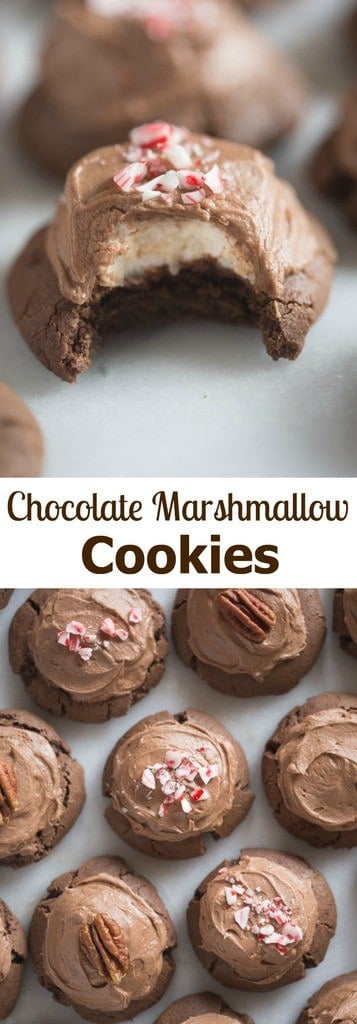
My great aunt used to make these amazing Chocolate Marshmallow Cookies, no one had her recipe so my mom helped me experiment to recreate them. With some trial and error, we’ve done it and I am SO excited to share them with you. They are the ultimate chocolate cookie and perfect for Christmas!
How to Make Chocolate Marshmallow Cookies (an overview):
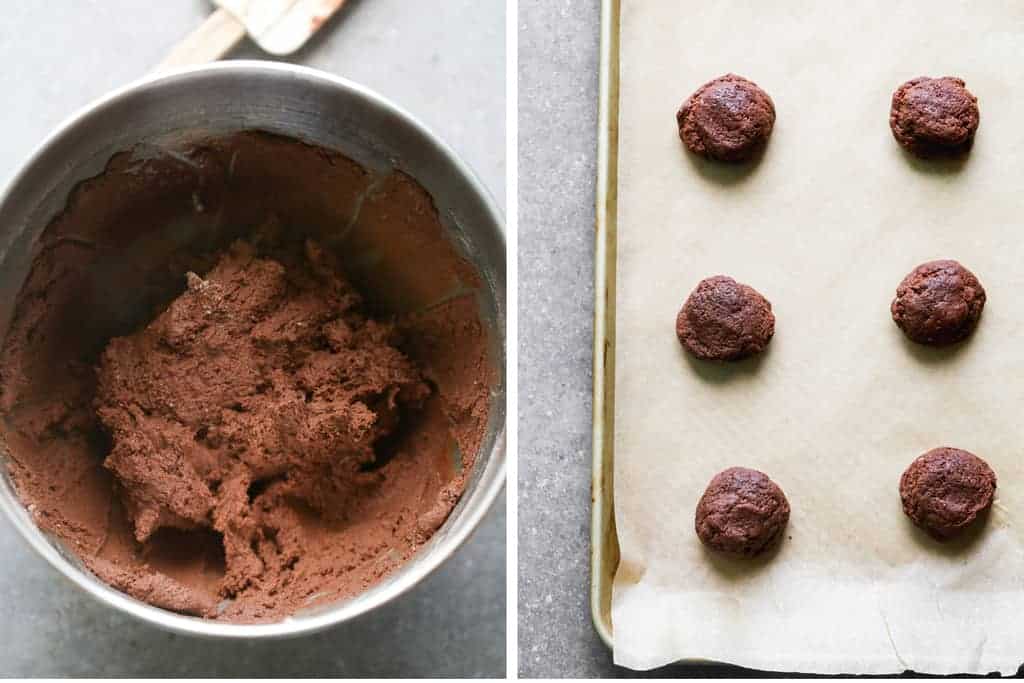
- Cream butter and sugar in a large mixing bowl until light and fluffy. Then add eggs and vanilla and mix well.
- Combine dry ingredients. In a separate bowl, combine the flour, cocoa powder, baking soda, and salt. Add to the bowl with the creamed butter mixture and stir just until combined.
- Scoop onto baking sheet. Line a baking sheet with parchment paper and scoop the dough by rounded tablespoons onto the pan.
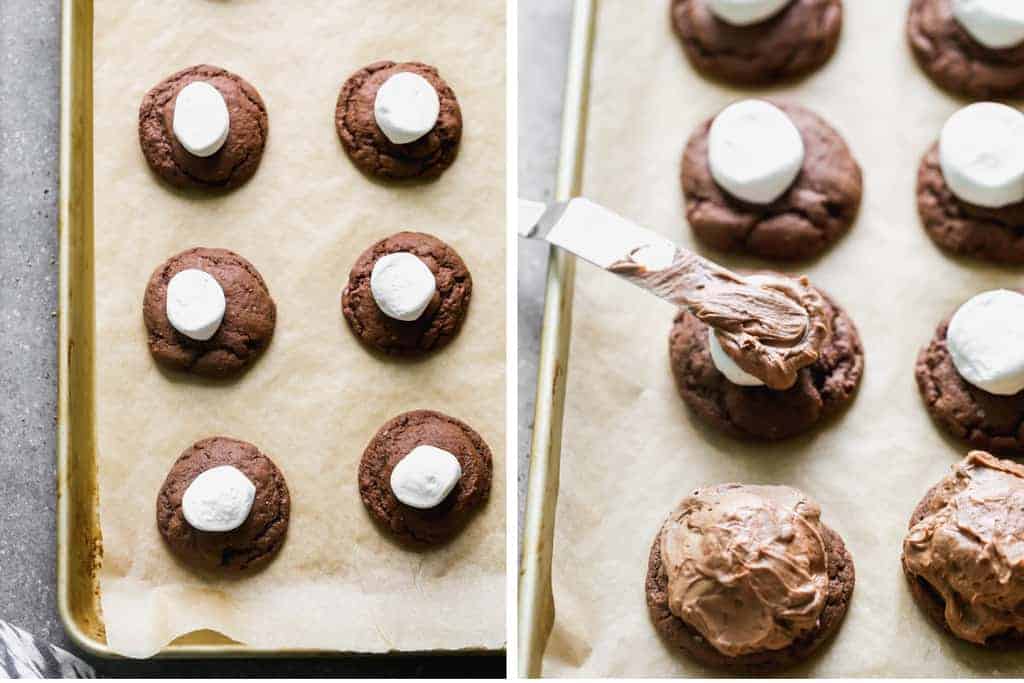
- Bake, then top with a marshmallow. Bake the cookies for about 8 minutes. Remove from oven and top with half of a marshmallow half (cut-side down). Return to oven for 2 minutes.
- Cool and make frosting. Allow to cool completely while you make the frosting.
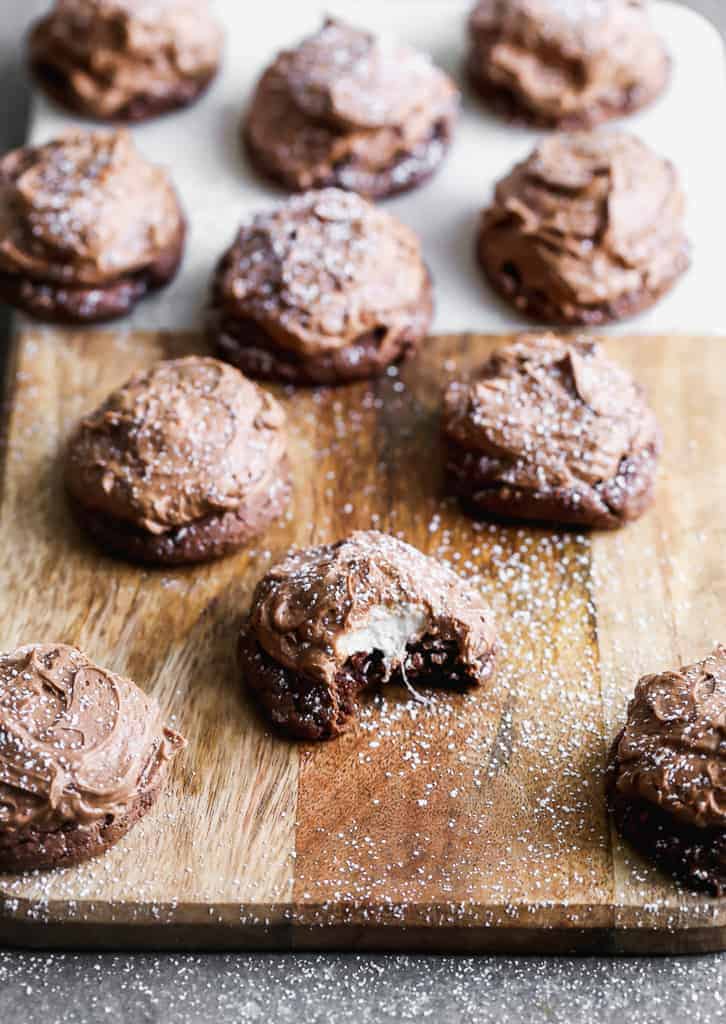
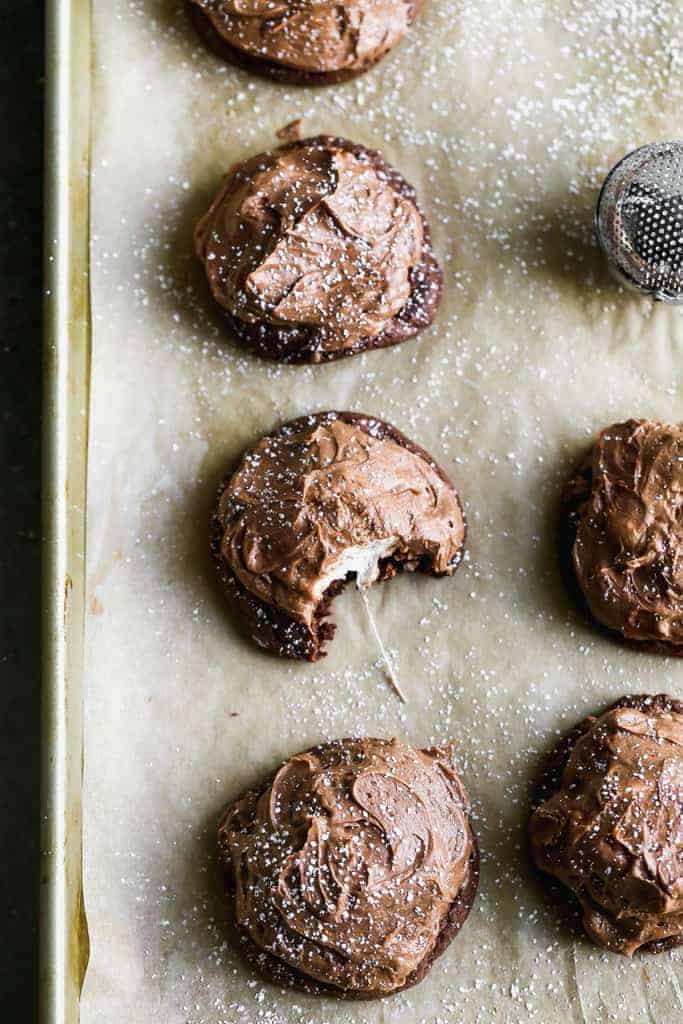
- Frost and enjoy! Cover the tops of the marshmallow and cookie with frosting. Store leftover cookies in an airtight container, or freeze for later.
You could also top the chocolate frosting with crushed candy canes or a nut. My great-aunt always added walnut on top.
Storing and Freezing Instructions:
Once cookies have cooled completely, store them in an airtight container on the counter for 3-4 days. To freeze place them in a freezer safe bag or container and freeze for 2-3 months.
Chocolate Peppermint Bundt Cake Rocky Road Fudge Caramel and Chocolate Dipped Pretzels Peppermint Candy Cane Brownies Brownie Truffles Christmas Cornflake Wreaths Homemade Caramels
You can also FOLLOW ME on FACEBOOK, TWITTER, INSTAGRAM and PINTEREST for more great recipes! RATE and COMMENT below! I would love to hear your experience. I originally shared the recipe December 2016. Updated December 2019 with step-by-step photos and instructions.
This post contains affiliate links.