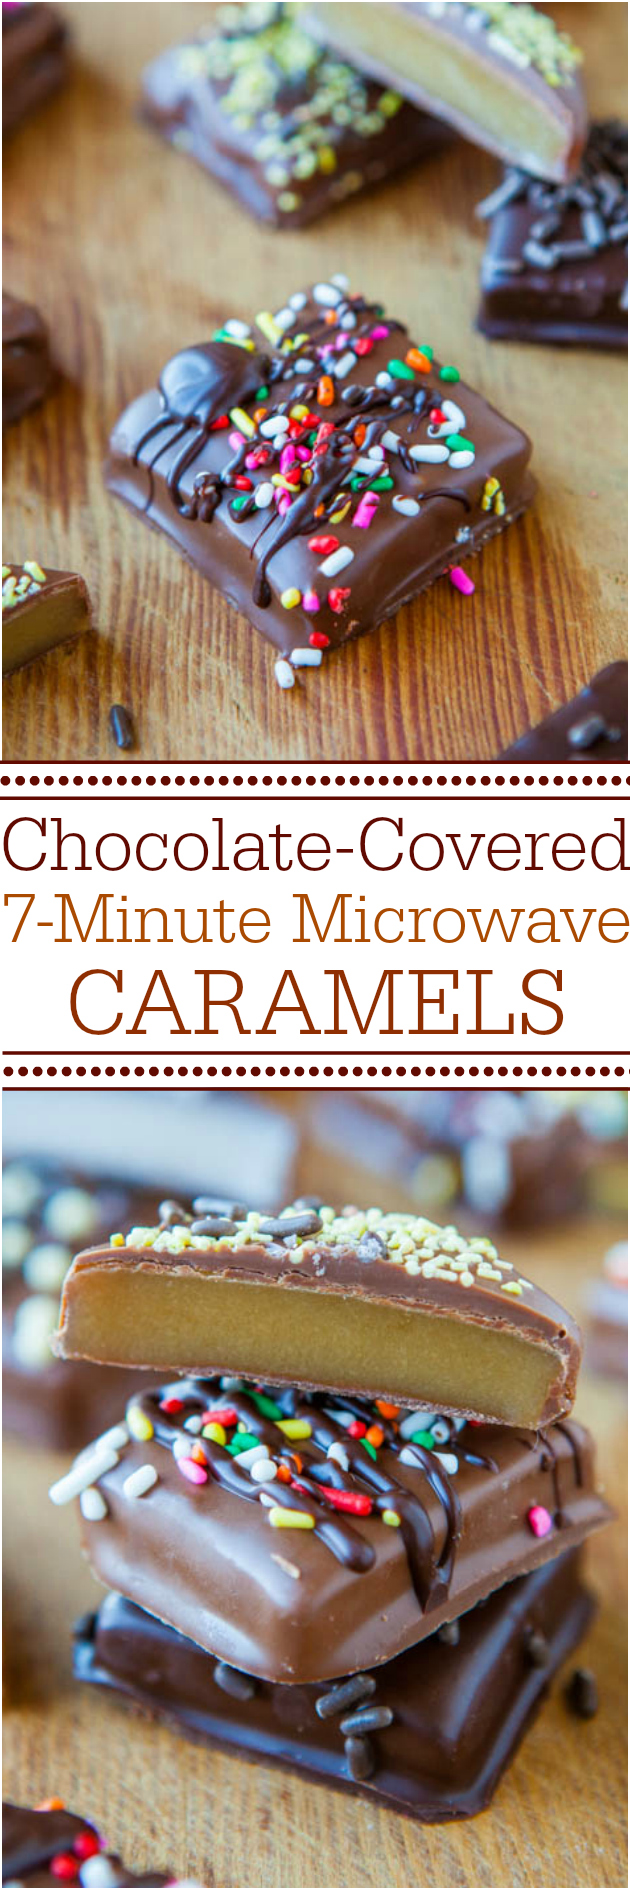
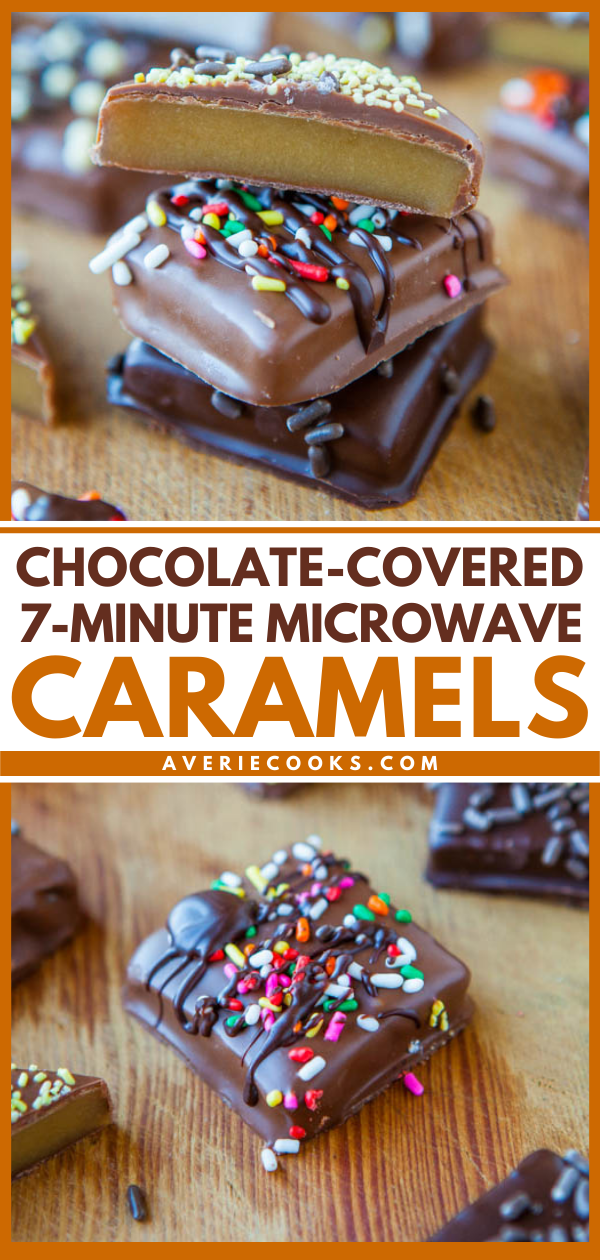
If there’s one thing I like better than homemade caramels, it’s homemade caramels dipped in chocolate. And decked out with sprinkles. They make everything better. Last week when I made the Peanut Butter Cup Cookie Dough Crumble Bars and used half of a can of sweetened condensed milk, the other half was just begging to be made into caramels. So that’s what I did. In seven minutes in the microwave.
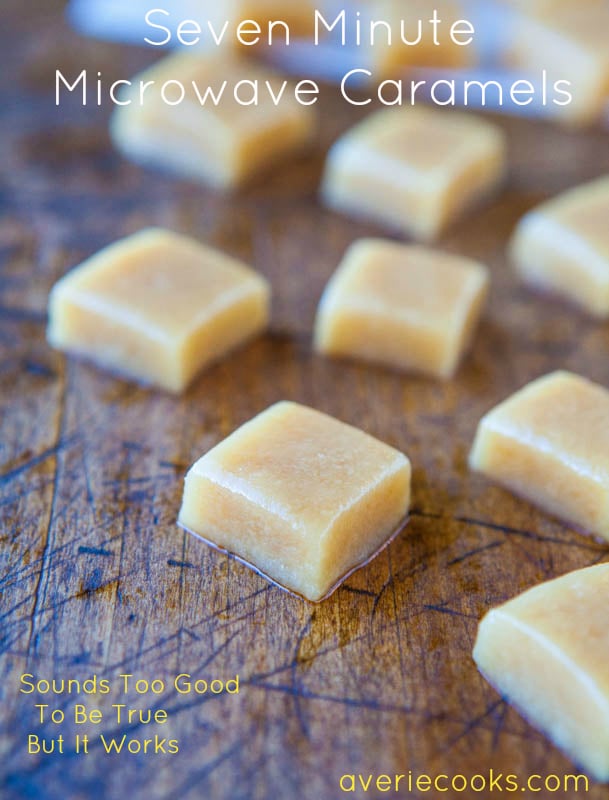
They’re based on my January recipe for Seven Minute Microwave Caramels (no-bake, gluten-free) and yes, it really works. No candy thermometer, nothing fussy, tricky, or complicated. The recipe is not only easy, it produces the best tasting caramels I’ve ever tried. Move over Godiva and even my beloved Sees. I prefer these.
To make them, combine a half can of sweetened condensed milk with four other halves: half cup of melted butter, half cup of corn syrup, half cup of brown sugar, and half cup of granulated sugar. Microwave it all together for 7 minutes, stopping at the halfway point and stirring briefly. I wrote in detail in the other post about what to do and not do, tricks and tips, and the following is what I believe bears highlighting.
The bowl will get crazy hot. Make sure your bowl is truly heat-safe. After stirring at 3:30 mark, take a damp paper towel and wipe around the sides of the bowl to remove any gritty sugar that’s clinging. Undissolved sugar granules that are clinging to the sides could result in your entire batch turning grainy. Grainy-ness spreads like wildfire and it will take over the pan like a bad science experiment.
You must line your pan with foil. Use a non-stick foil like this one, and spray it extremely liberally with cooking spray so that you don’t have molten caramel stuck to either your pan, or your foil. When slicing the caramels, do it on a piece of parchment on top your cutting board. Use a pizza wheel or an extremely sharp knife, sprayed with cooking spray. They stick to everything so take precautions to avoid it.
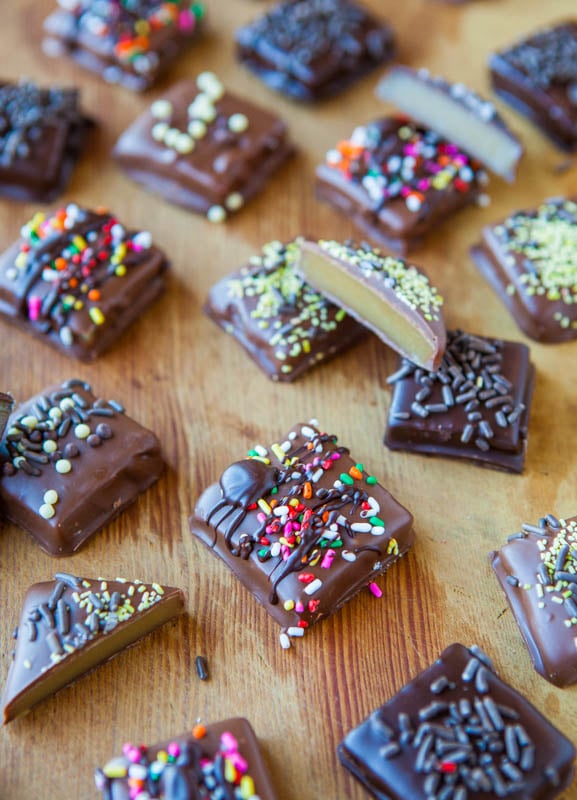
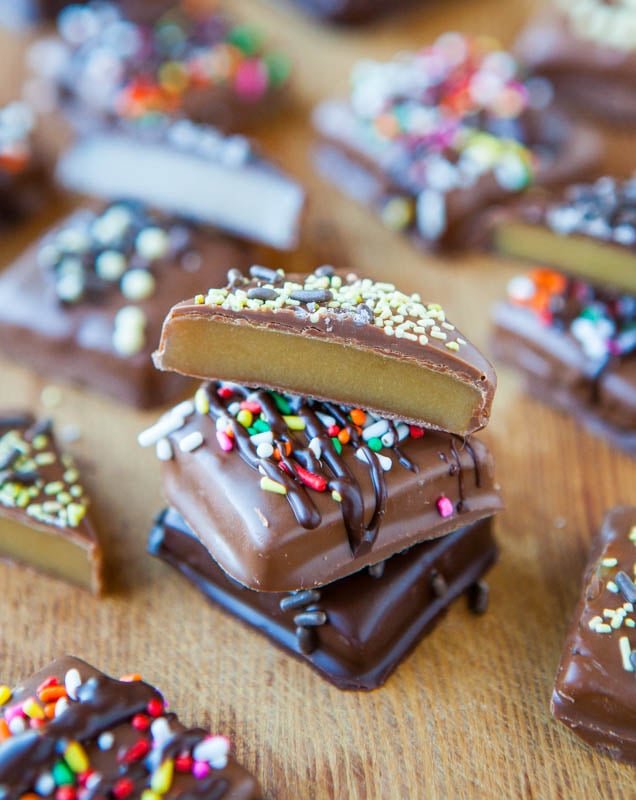
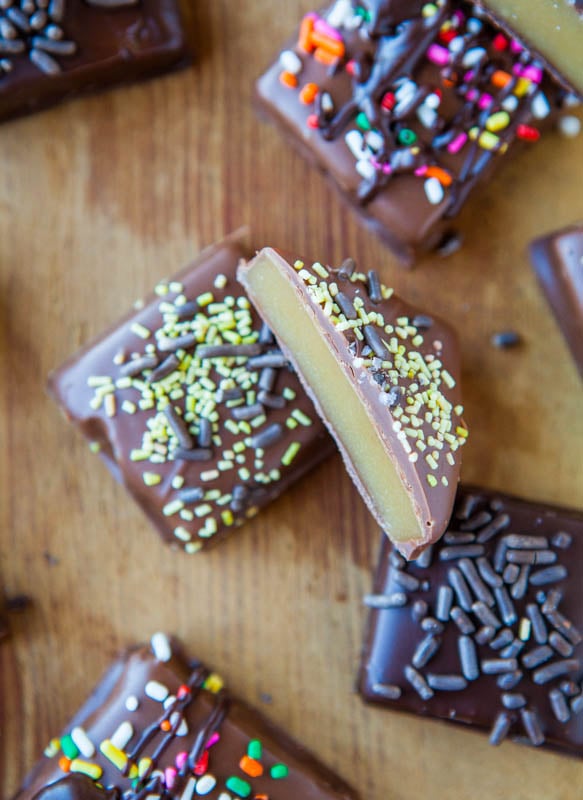
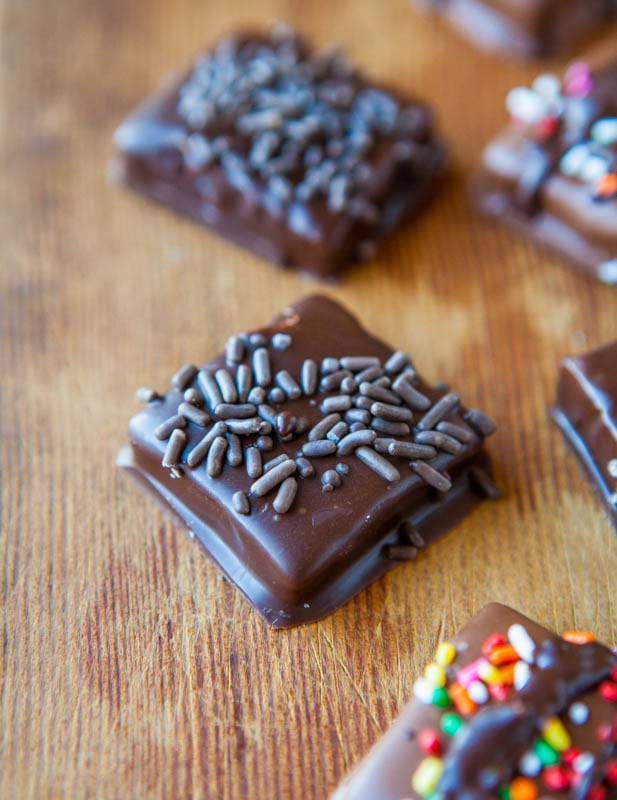
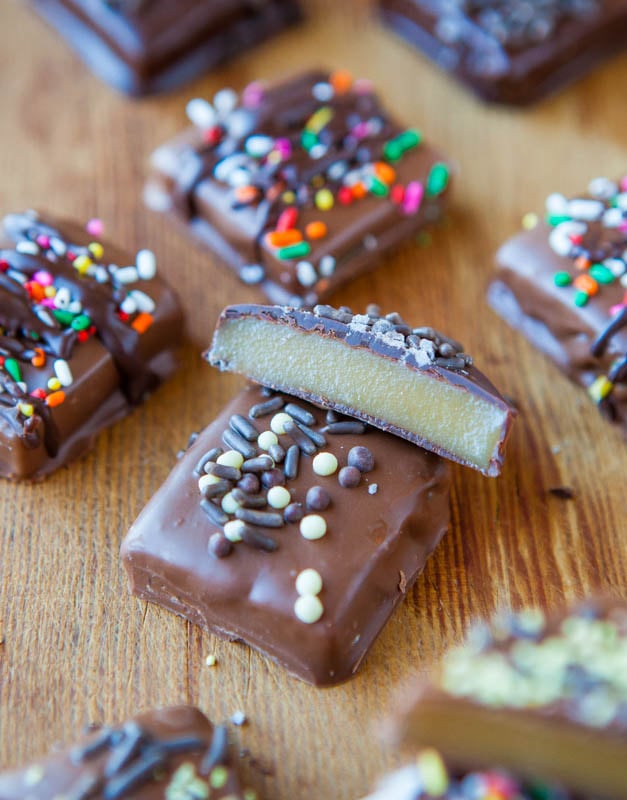
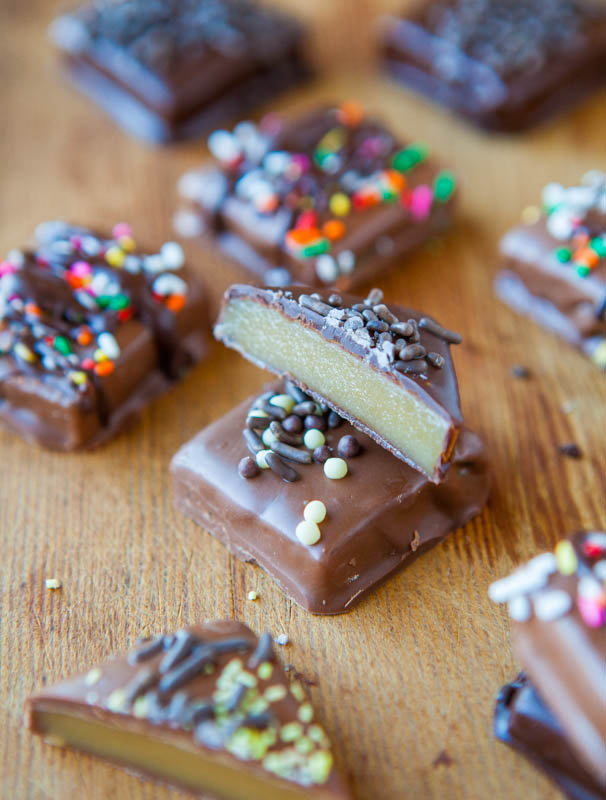
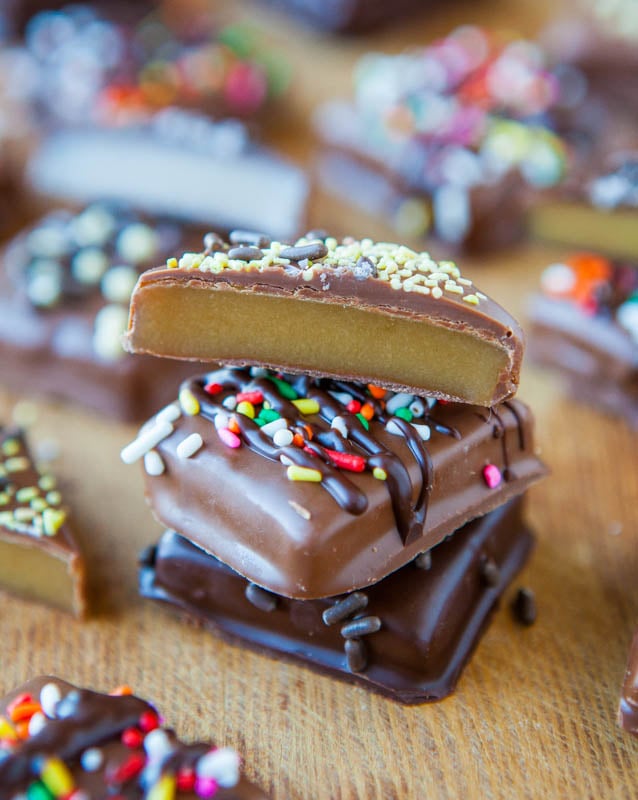
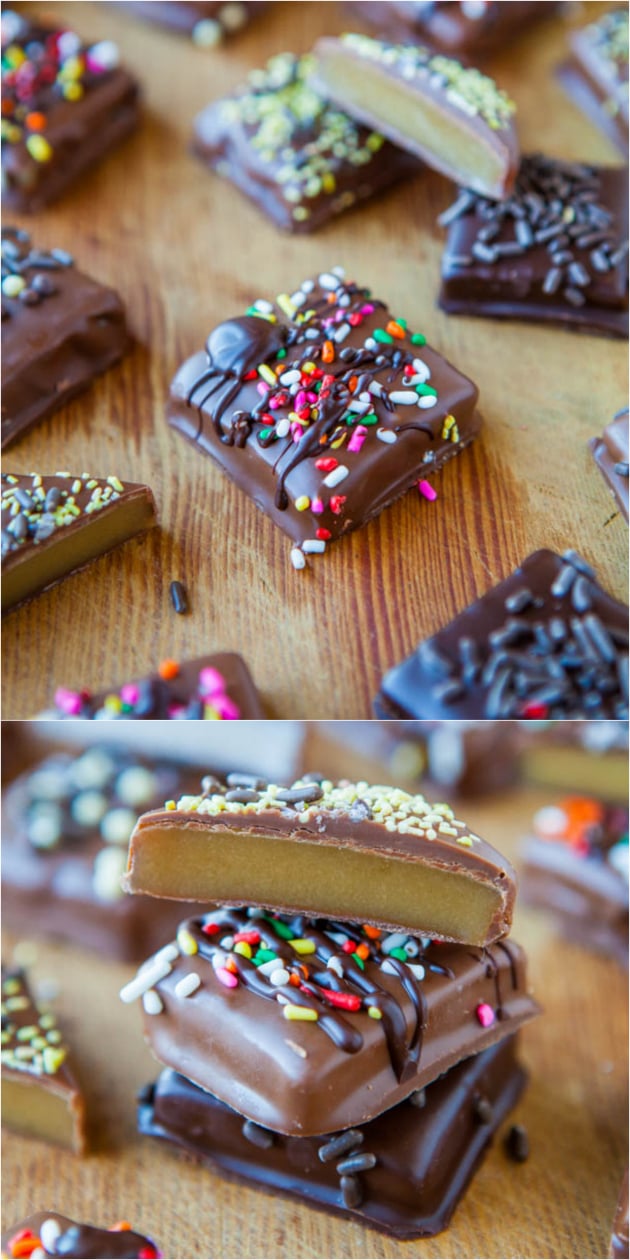
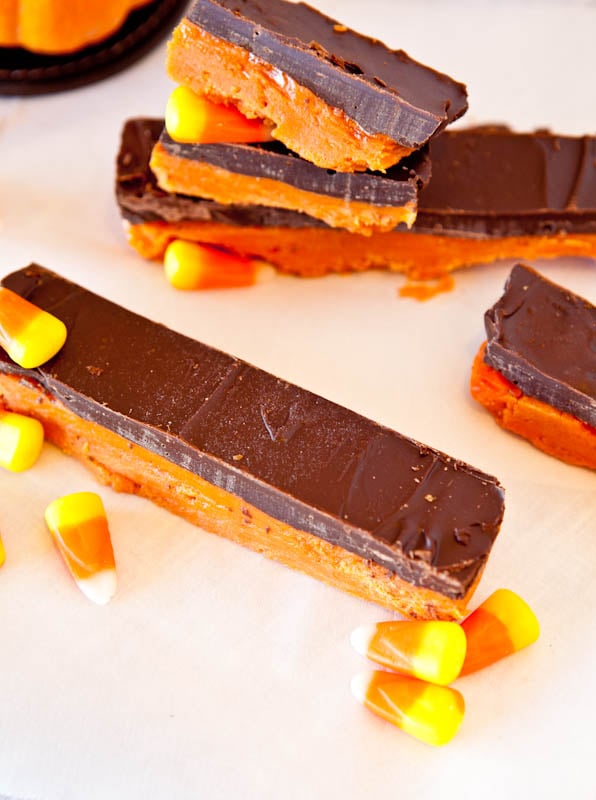
When melting the chocolate for dipping, I highly recommend using baking chocolate or chocolate sold in bars, not chocolate chips. They’re more resistant to melting, and thicker and gloppier to work with. I used a medley of Trader’s Joe Pound Plus Bars: Milk (32%), Dark (54%), and Darker (72%). Normally I don’t gravitate to eating or baking with milk chocolate, but with the caramels, the milkiness is very complimentary to their creaminess. Don’t automatically dismiss milk chocolate, thinking darker is better. Milk chocolate really shines here.
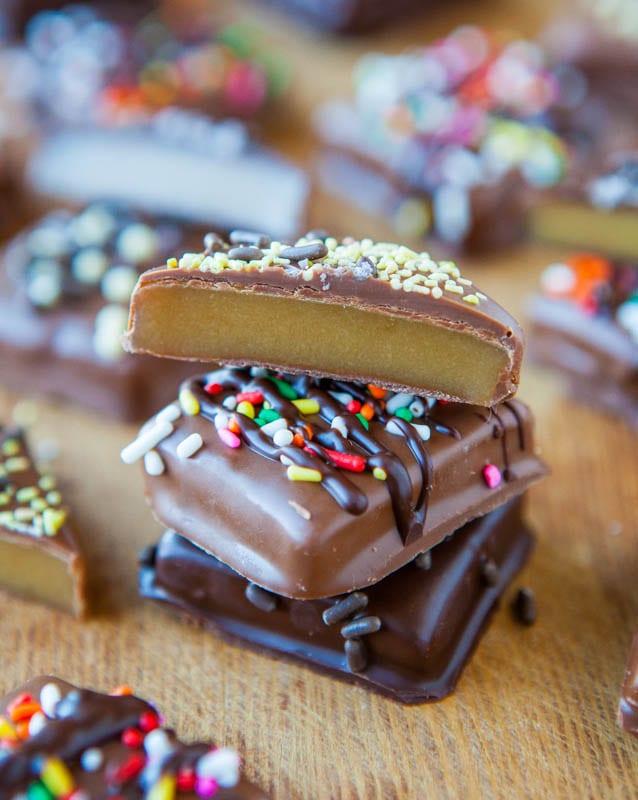
I highly recommend a tablespoon or two of shortening stirred in after the chocolate has melted. This helps the chocolate behave more like Candi-Quik, staying smoother longer. It makes any chocolate dipping project so much easier. I keep a small can of it in my pantry for this purpose only. When dipping, quick baths in the chocolate are preferred to long, luxurious soaks. Balance the caramel on the tines of a fork, lower it, just cover it with chocolate, and get it out. Too long in the warm chocolate not only begins to melt the caramel, but it adds more chocolate than necessary, and you’ll have to melt more chocolate sooner rather than later, and it’s a pain to stop and start. Place the dipped caramels on a parchment-lined tray or plate, and before the chocolate sets (you have many minutes if using shortening so not a rush), sprinkle them with your favorite jimmies, sprinkles, slivered almonds, coarse sea salt, graham cracker crumbs, dried cranberries, bacon bits or whatever your heart desires. Refrigerate for at least 2 hours. There will be chocolate “duck feet” as I call them on the bases of the caramels where it pooled on the parchment. Either nibble it off, break it off with your fingers, or if you want to make them look professional, trim it with a knife.
The caramels are smooth, creamy, buttery, with prominent notes of vanilla. They’re soft, chewy, rich and simply my favorite caramels ever.
I’m convinced they’re the best possible use of my microwave and 7 minutes of time.
Related Recipes
Seven Minute Microwave Caramels (no-bake, gluten-free) – The original recipe with more step-by-step shots and more how-to details Tried this recipe? Leave a review! Consider leaving a 5 star rating if you’ve made and loved one of my recipes!
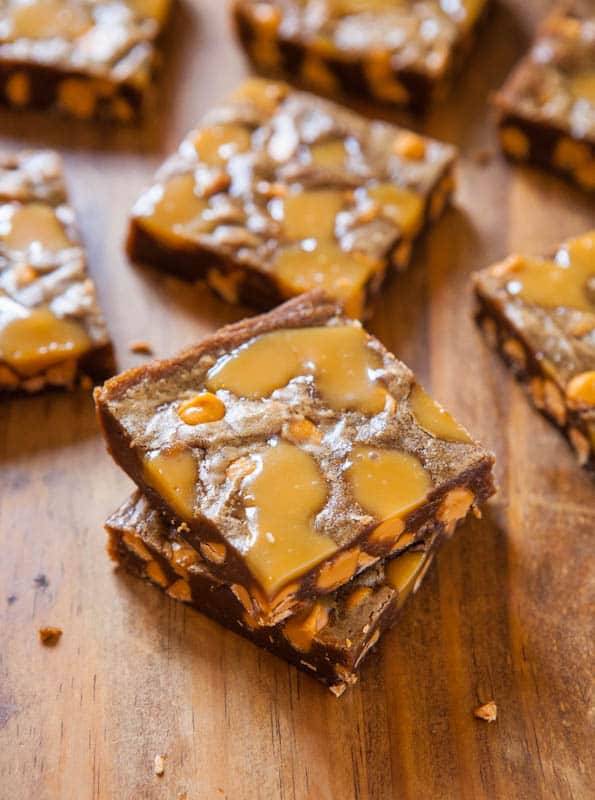
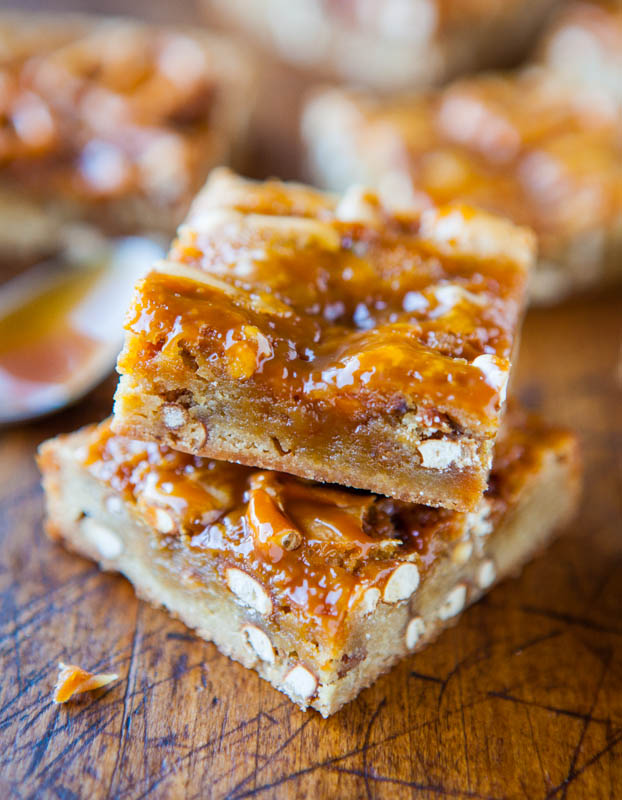
Browned Butter Caramel and Butterscotch Bars – Nutty and aromatic browned butter is paired with dark brown sugar, sweet butterscotch chips, and creamy caramel to create dense, rich, fast and easy bars
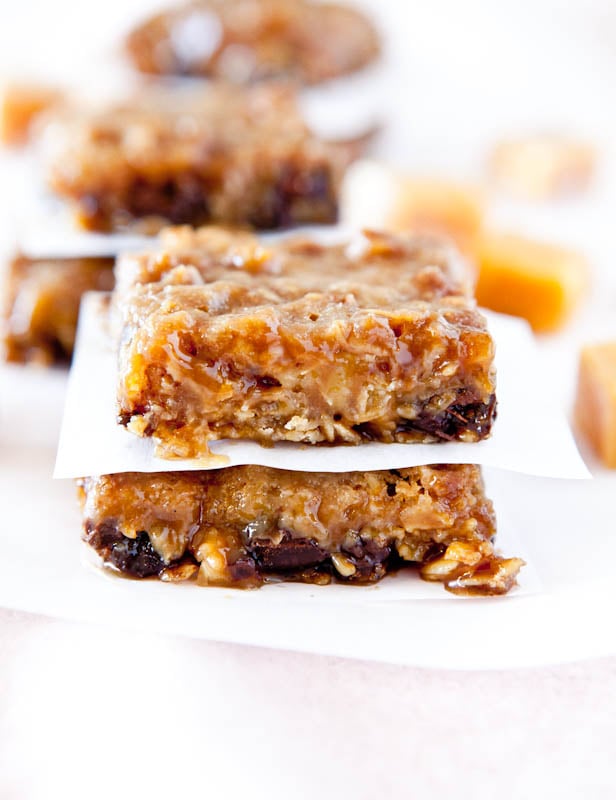
Caramel and Chocolate Gooey Bars (GF with Vegan adaptation) – Caramels, chocolate and oats are combined in these gooey, sticky, sweet, and texture-rich bars
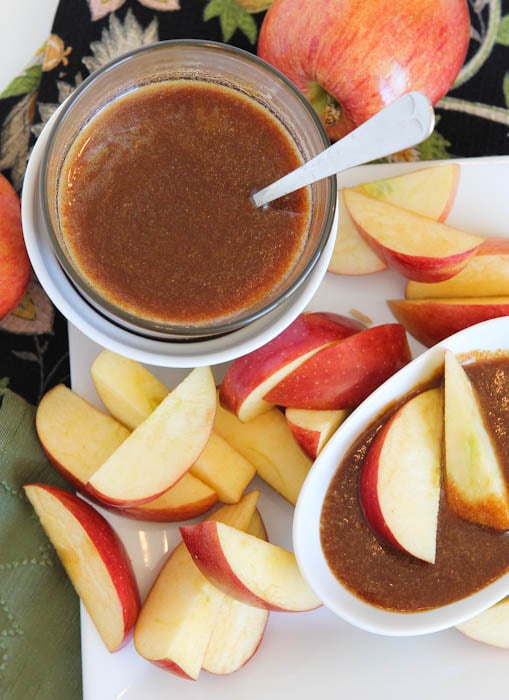
Dark Rum Caramel Sauce (gluten-free) – The caramel sauce can be made with or without rum, although I recommend it. A step-by-step guide for easy at-home caramel sauce to be used on everything from ice cream to apples
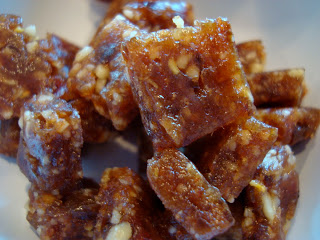
Raw Vegan Gluten-Free Caramels – Three ingredients and you’ll never believe what they are. Creamy, rich, easy, and fast. Some I filled with peanut butter in the middle f0r peanut butter-caramel sandwiches
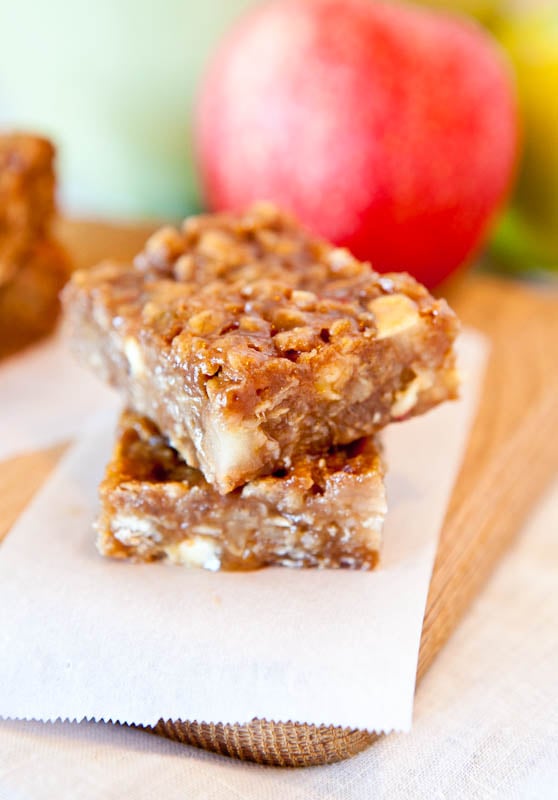
Caramel Apple Bars (gluten-free with vegan adaptation) – Apples, oats, brown sugar, peanut butter and plenty of caramel sauce are combined for a fast and easy bar that’s full of texture and richness
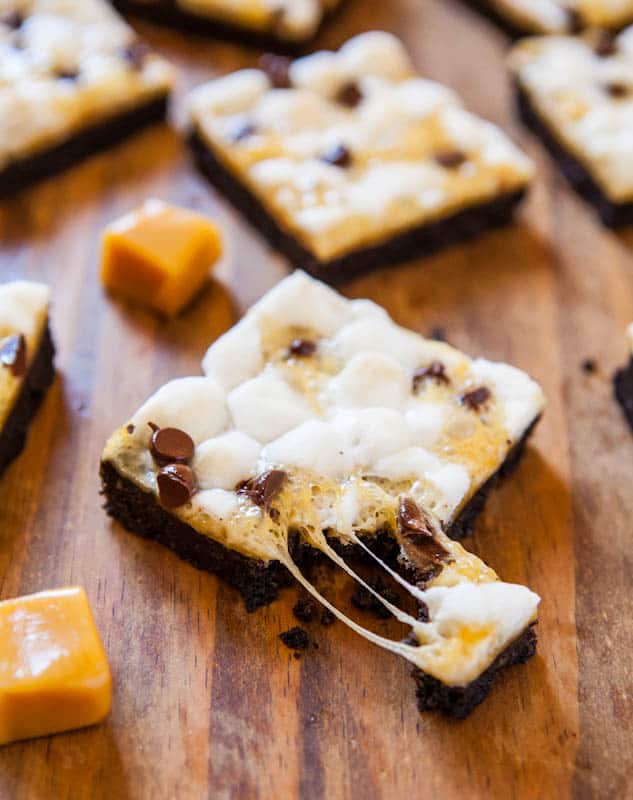
Marshmallow Caramel Oreo Cookie S’Mores Bars – An Oreo cookie-crumb and buttery crust is topped with marshmallows, caramels, and chocolate chips for an easy and fast dessert reminiscent of s’mores
Homemade Little Debbie Star Crunch (no-bake) – One of my favorite childhood treats, recreated. They include plenty of gooey caramel, tons of texture, and the flavor is spot-on
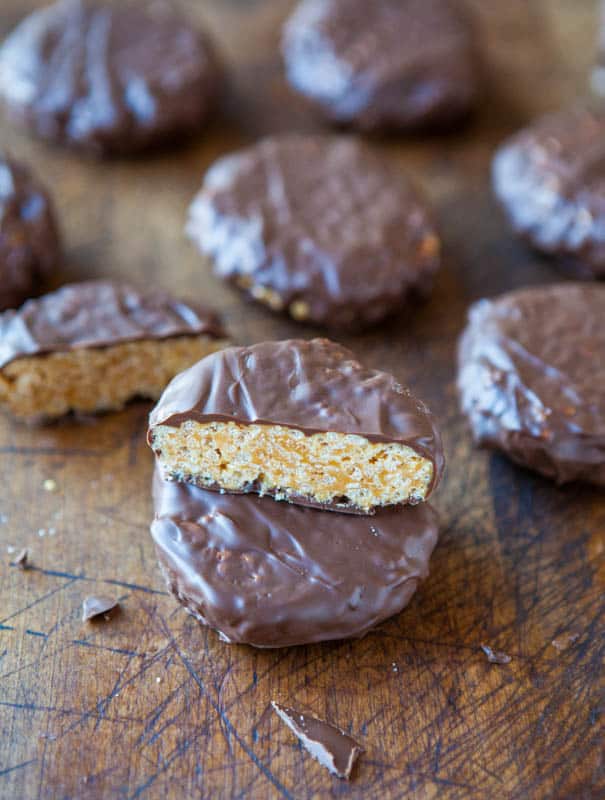
Butterfinger Bars (No Bake, Vegan & GF options) – Make in the microwave in minutes. They’re a dead-ringer for the original and made with 3 ingredients
Do you like caramels? Do you make your own caramel sauce or caramels? Or homemade candy? Share links to your favorite recipes.